
|
|
Man, this kit brings back memories! I was 17 and working in a grocery store in my home town and noticed the ID4 kits sitting on the shelves of that store well before the movie hit theaters. The design of this ship had a retro look which caught my attention. |
| I can't remember if I built it right away or after I saw the movie but either way, it marked a point in my model-making experience where I went out of my way to try and make a kit look good. In this case, it was the paint which I had custom mixed at a local Napa Auto Parts store. This doesn't compare to what I do now when attempting to make a model kit look good but it seemed like a big deal to me at the time. Anyways, here's what happened. |
| - blast to the past - |
| It didn't take long to complete the attacker since it only consisted of 14 parts and because I wasn't aware of filling seams at the time. As I mentioned before, I got the main color, Gun Metal Blue, mixed. The kit suffered poor alignment but I didn't care back then. I remember liking the stand because it was based on the stand holding the 1:1 scale ship in the movie. Well, I assembled everything with Testors glue, spray painted the main color and brushed on the silver, black and copper areas. Quick, easy and painless! It sucks that I never took pics of it in all it's hotness! |
| - fast forward to 2005 - |
| While going through one of my junk boxes late 2005, I found some stray pieces from this kit, a few which were broken. I began to wonder about where the model was. Luckily while on vacation during the summer and back in my hometown, I found the majority of the kit sitting in my Dad's storage...dusty and missing pieces. I brought it back with me and decided that I would have to revive it. | 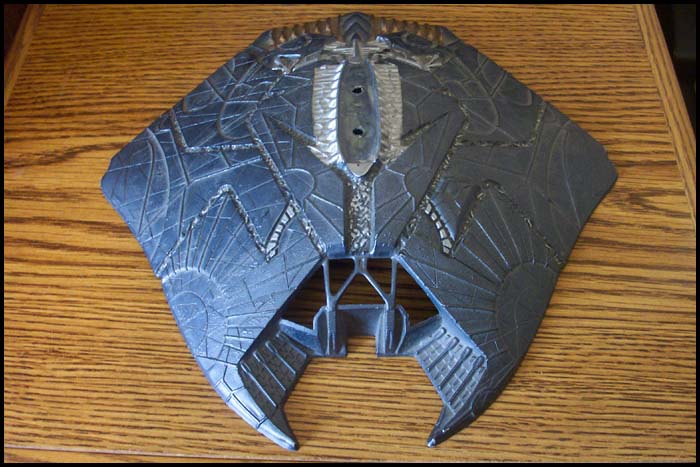 Dusty top half of hull. 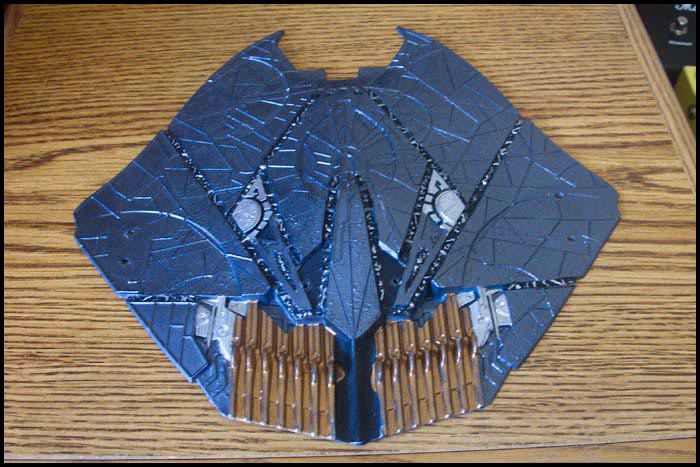 Bottom half of hull. 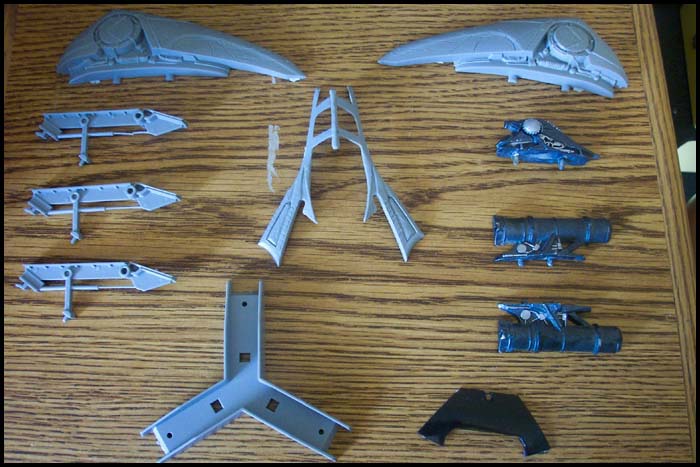 Small Parts |
| The first thing I had to do was find the parts that were missing. A very cool modeler over at the StarshipModeler.com forums answered my call and very kindly gave me the parts that I needed! Awesome! Next I had to worry about that old paint. I really like the gun metal blue color but it was time to trade it in for a more accurate paint job. | |
| Here are some pics of the original model. You'll notice a few things such as how dusty it was, how inaccurate of a paint scheme it had and the new unpainted pieces. |
| - stripping her down - |
| Back in my model car building days I learned of Easy-Off oven cleaner and it's power to strip paint off of plastic. I tried this method once again on a piece of the missile launch tube and was surprised to see that it didn't work very well. It was time to try something else that I had been reading about, Castrol Super Cleaner degreaser (now just Super Cleaner after being sold to another company). I'd always heard that this stuff really strips paint and was both disappointed and amazed. I was disappointed because it didn't completely get the job done after a 48 hour soak despite the fact that the coat of paint was very thin. It wasn't that the degreaser didn't work because I soaked a part from a different model and it was stripped bare and that amazed me! | 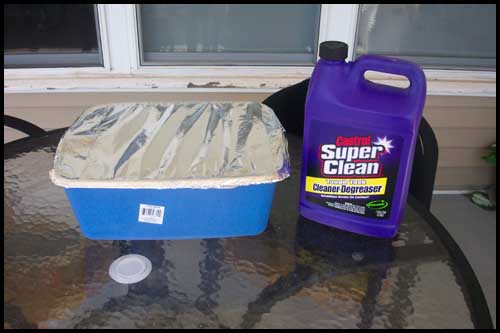 Castrol Super Clean 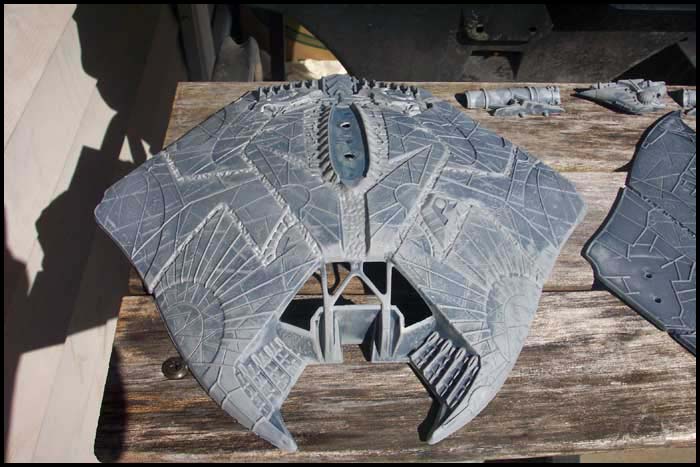 Stripped Upper Hull 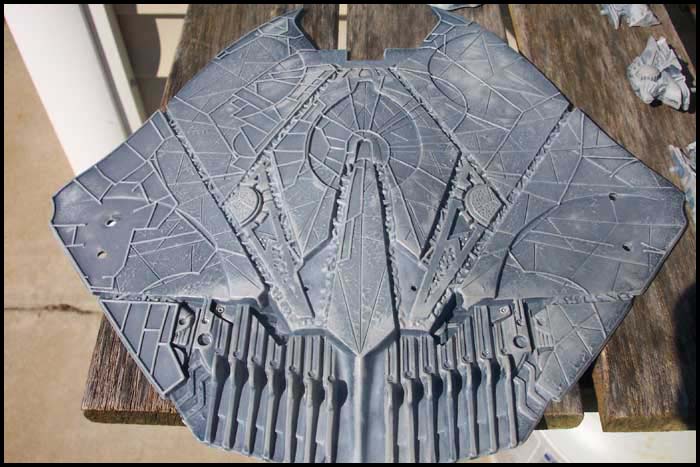 Stripped Lower Hull |
| What happend, it seems, was that the surface of the model was crazed by the automotive lacquer that was used to paint it originally. This caused the paint to settle into these microscopic swirls leaving a stained look. The lack of a primer coat, I think, helped the lacquer burn the plastic. According to a great article about paint strippers over at BoneDiggers.com called Strippers! - Making Mistakes Disappear, the only thing I have to worry about is the potential for this leftover paint to hold CSC and possibly affect the upcoming coats of paint. I went ahead and washed the model really well with dish detergent and water and left it out to dry for a few days. Later, a coat of Plasticoat Gray Primer proved that the surface was suitable for paint. |
| - fixing the problem areas - |
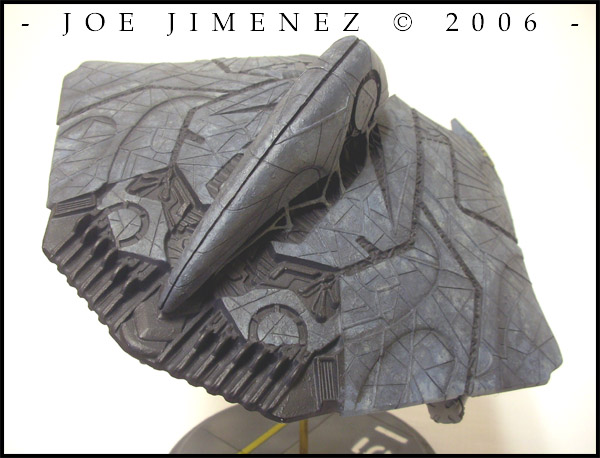
| This kit is full of inaccuracies including the front area around the cockpit window. For one, the bars that go over the window are way to thick. I went ahead and cut those out along with the excess plastic where the dorsal spine goes. This is needed to help that piece sit flush against the hull. |  Window Bars  New Bars 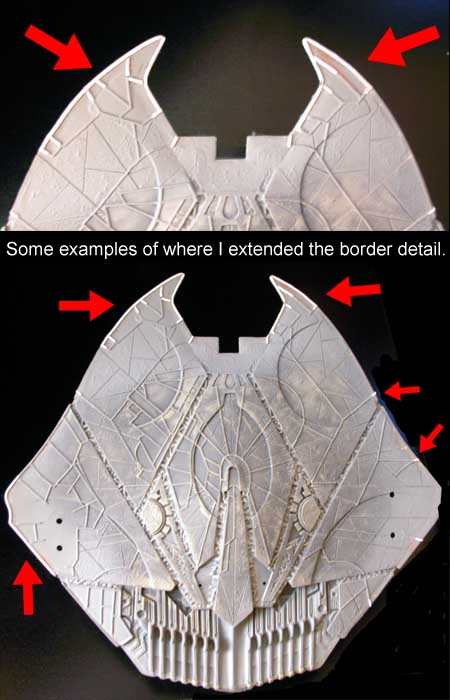 Borders 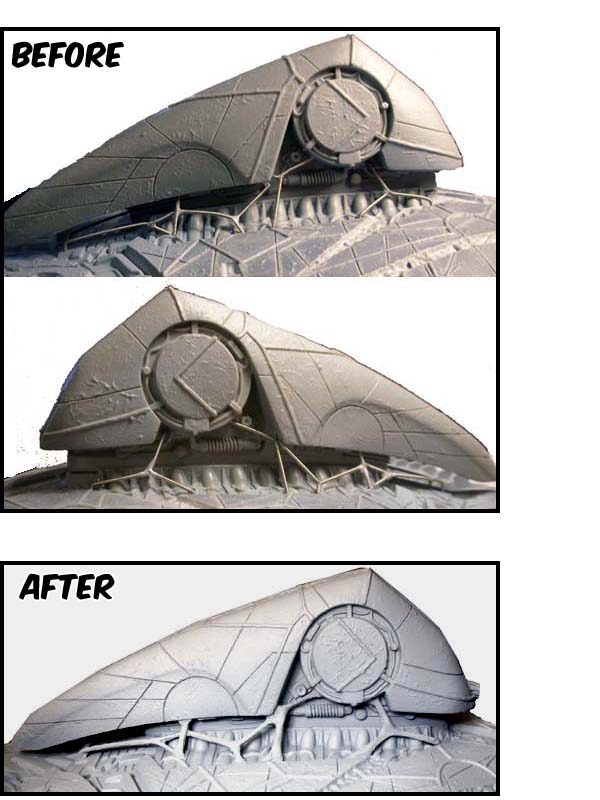 Organic Looking Detail  Grill & Cannon |
| The window beams were sculpted out of Aves Apoxie Sculpt. This stuff, for me, was a little strange to work with at first but I grew to like it. Now, I will not use anything but Aves for seams and gaps! | |
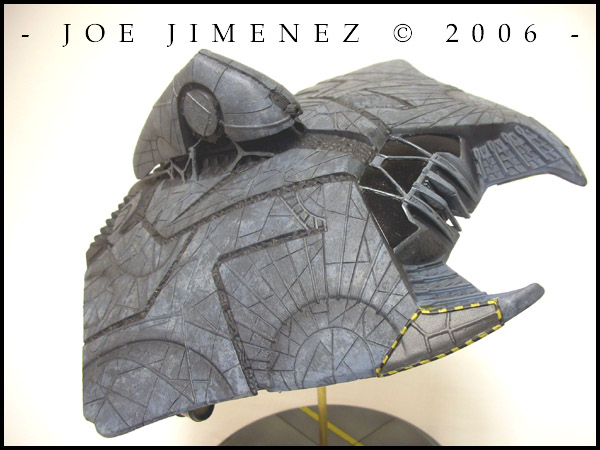
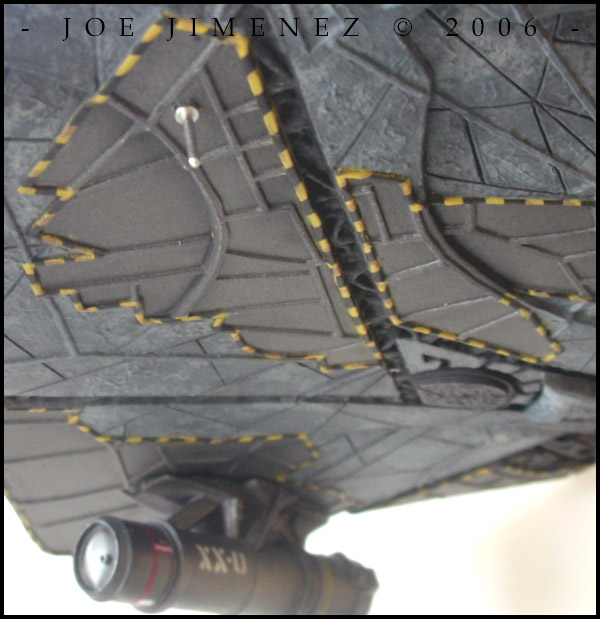
| The assembly of the top and bottom hull halves resulted in a large and unsightly gap, by far the biggest flaw of this kit.. A few things had to be done to hide it. First, I made sure that all areas around the edge, where the gap was, were flush. Any areas not flush were filed down a bit. I then filled the entire gap with Apoxie Sculpt and smoothed it out to avoid as much sanding later as possible. Once that was ready, I fine sanded a few areas and then went to work on extending the edges of the repaired plates. The picture will explain things a bit better but all I really did was glue thin strips of styrene to the outer edge. | |
| For the detail under the spine piece, which is sadly not included in the kit, holes are drilled and guitar string put in place. Apoxie Sculpt was then sculpted over the guitar string support until the desired shape was achieved. I followed the reference photos of the studio model as best as I could. | |
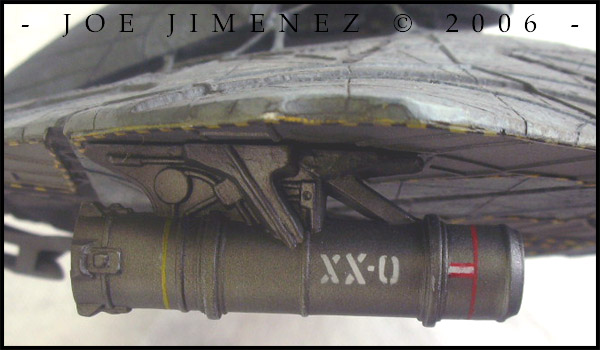
| It was at this point that I was able to get around to the detail underneath the windshield. Kit bashed parts were used for the basic shape of each curved extension and the final form sculpted using Aves Sculpt. There are also some modified parts in the large gap...detail that is not accurate but looks good enough. Also, the spine cannon is missing on the kit so I added my own detail. The cannon was shaped from scrap styrene and aluminum tubing with bits of styrene for the back plate. |
| - painting - |
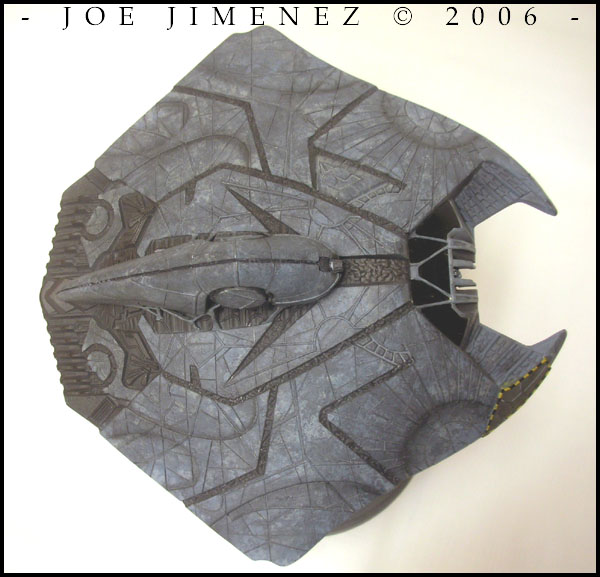
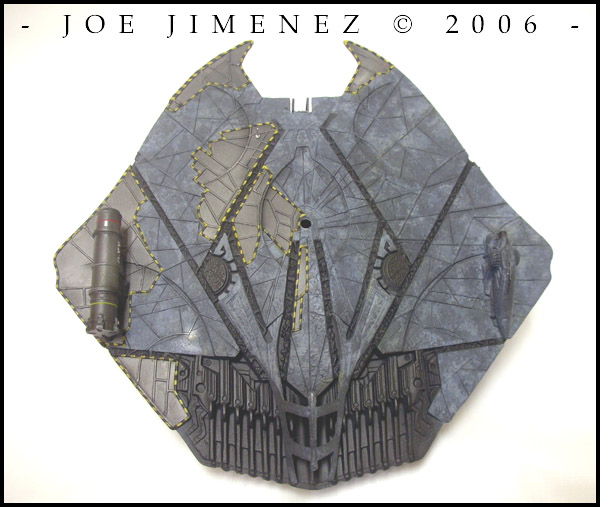
| It's pretty simple really. First, I masked off the window and dropped a coat of Plasti-kote gray primer. Next, the repaired panels were shot with a coat of Model Master Gun Metal Non-Buffing Metalizer and then with a light coat of Alclad II Aluminum. The panels were clear coated and masked to protect from further painting. |  Primer Coat 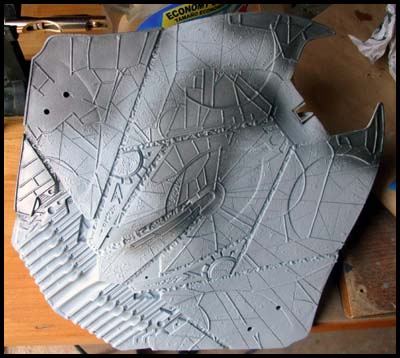 Repaired Panels 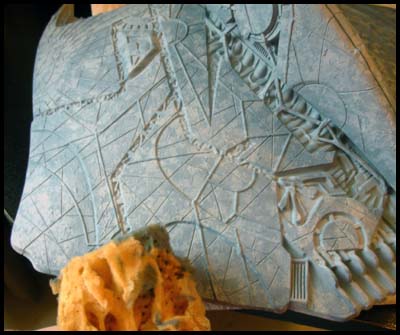 Sponge Technique 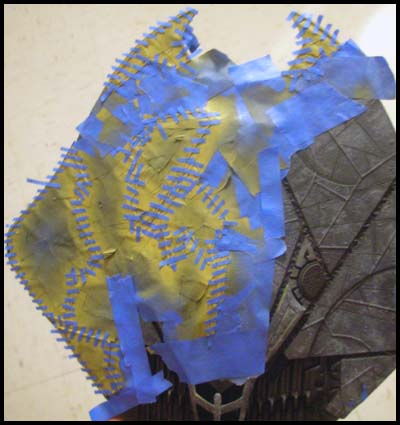 Warning Lines |
| I custom mixed a blue-gray base coat which was airbrushed on. When dry, I applied a coat of thinned light gray paint by taking a piece of natural sponge (the kind used to paint walls and add depth), dipping it into the paint, squeezing out the excess and dabbing the entire model. Two more coats of paint were applied using the same method, each coat a darker shade of the base coat. I tried to make sure that I didn't overload any of the coats so that the paint would not look out of scale. I did try to create some shadowing by depositing the darker shades to corners and lighter shades to high points but didn't get to precise since, ultimately, I wanted more of a random effect. | |
| Later, after clear coating the entire model and about an hour or so of tape and liquid latex masking, I applied flat black paint to the large trench lines, engine area and detail underneath the spine. The black was a bit strong so I toned it down with gray chalk pastels. Another clear coat later and I was ready for the most tedious part of the entire build. | |
| My first attempt to add warning lines around the repaired panels failed miserably when I brushed painted the yellow and drew in the black lines with a Sharpie marker. I sanded the raised borders and decided to do it right. I masked off all the panels and surrounding areas except the raised borders. The yellow color was first airbrushed followed by more masking and then a few coats of black. During the same time, I created a stencil using Photoshop and painted the details on the missile launch tube. A nice improvement for sure! | |
| I finished things off by using ground chalk pastels to further create shadowing, especially around the circled panel areas of the hull. Raised detail received some light dry-brushing and the windshield got a few coats of Future floor wax. I then hit the rest of the model with a coat of flat clear, sealing all my hard work. |
| - base - |
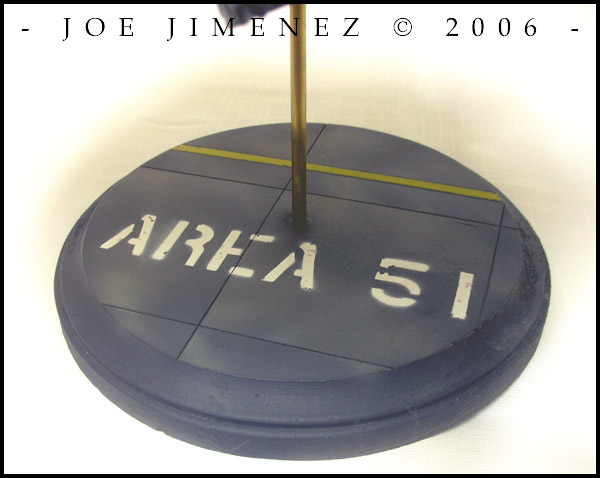
| I wanted to use the kit base but when I finally assembled it and test fitted the ship I realized that the model sat too low and looked very uninteresting. So, I busted out an inexpensive round base, the same kind I have used on some of my other models. Coming up empty on ideas for the theme of the base, I finally decided to depict the scene in the movie where the captured spacecraft, piloted by Captain Steven Hiller, first takes off and zooms over the Area 51 flight line on it's way to deliver a nice little present to the alien mother ship. |
| An article by Matthew Usher, in the recent issue of Finescale Modeler, was very helpful in that it demonstrated an easy way to fabricate a flight line base. I scribed lines directly on the base to create the concrete slabs, painted on the taxi line and stuck a brass rod in the center. The stencil for 'Area 51' was created in Photoshop. The end result...a nice and simple base served with a tiny amount of flair. |
| Before completely wrapping things up, I went ahead and made the tiny antenna that was installed by the Area 51 scientists to help detonate the bomb. I found a perfect electrical pin and simply painted it Alclad II Chrome. |
        |
| - all in all - |
| Well, it's been a long journey for this model but she's finally made it! I'm happy that I could use most of the main parts from the original model that I purchased so long ago as it holds sentimental value. The coolest thing is that it reminds me of days with little worries and plenty of time, and that's worth the wait to finally see it finished! |
| © Copyright 2005-2014. All photos of actual models are property of Joe Jimenez and cannot be used without permission. |