
|
| I hated the droid design at first and passed up the AMT kit (Battle Droid / STAP) because of that. However, after seeing several build-ups, I slowly started to appreciate the Battle Droid. This is a big kit and I chose to build only the droid. I actually have a few of these kits and one of those will be built with the STAP.... eventually. |
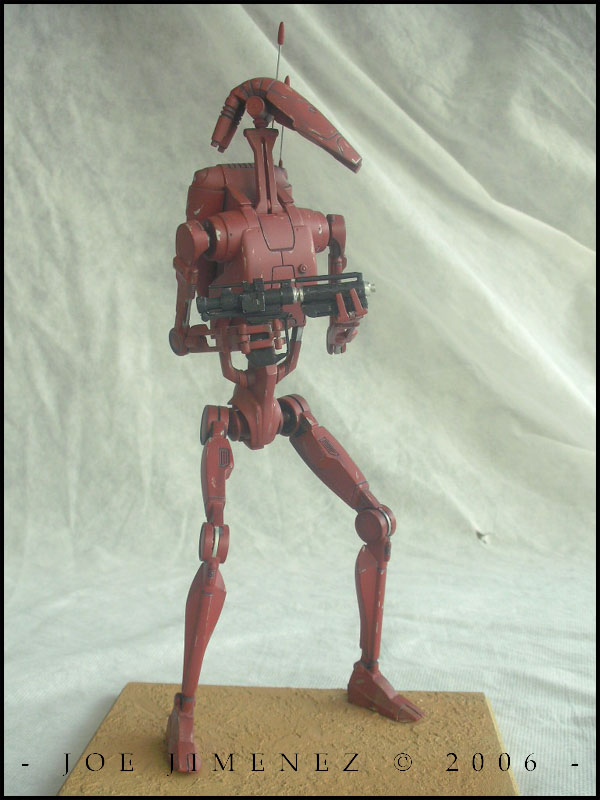
| - new pose & modifications - |
| The first thing I decided on was that I didn't want my Battle Droid to just be standing straight up. Since I wanted to pose mine getting ready to fire its blaster rifle, I had to alter many of the joints. This was the most tedious part! I eventually glued all the joints but before that all the limbs were very loose and I had a slightly difficult time trying to dry fit and find the right pose. |
| The neck was also altered to allow the head to turn to its sides. Other add-ons include floral wire for the antennas and the hydraulics on the biceps of the droid. |
| - Scratch-built gun - |
| My biggest contribution was a scratch-built blaster. I used different size aluminum and copper tubing, wooden popcicle sticks and styrene from for sale signs. Close to 40 parts make up this rifle. It's not 100% accurate but I think it makes it's point. I spray painted it with black primer and sealed with a flat clear. The neck was also altered to allow the head to turn to it's sides. Other add-ons include floral wire for the antennas and the hydraulics on the biceps of the droid. The only thing I didn't do was add the "serial number" on the backpack. I ran out of decal paper and will eventually get around to it. | 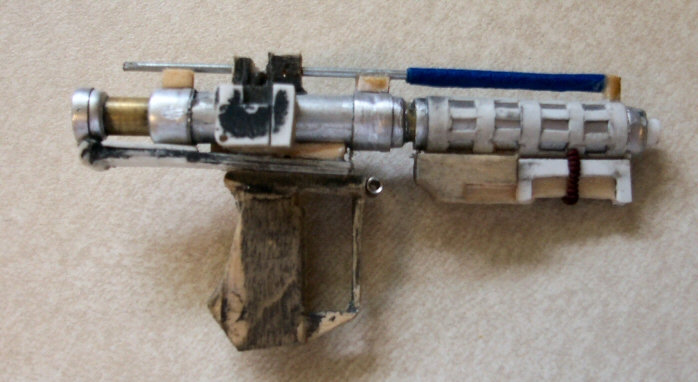 Blaster |
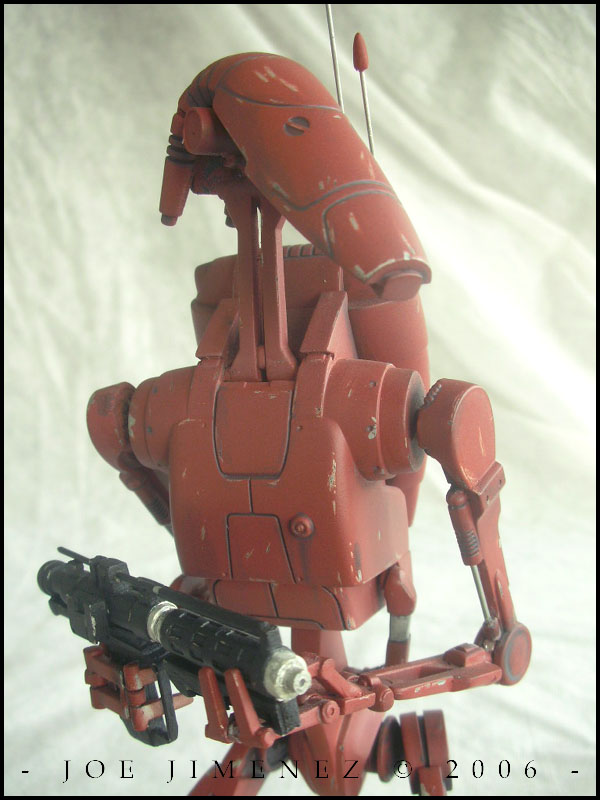
| - paint - |
| I really enjoyed the painting and weathering of this kit. It was a break from my airbrush as all the colors are spray painted. Originally I wanted to paint it tan as seen on Episode I but I hadn't seen a red droid so decided to go that route. |
| I started by spraying on black primer followed by Krylon Metallic Silver. A couple of coats of the Wal-Mart brand red oxide primer came next. When the time came to add damage, I paused a scene on the Episode II DVD of a droid during the Arena Battle and used my Exacto knife to scratch up the paint to mimic some of the wear. After this, I sealed everything with a coat of Future and applied a darkened red acrylic wash to all the panel lines. Later, I added more wear by brushing on some black chalk pastel. At this point I noticed that the red color was a bit too bright. To help tone it down, I added a couple of drops of white acrylic paint to some Model Master flat clear. |
| - base - |
| I'm not too good at making bases so I just did my best here. Since this was a Battle Droid from the Arena Battle, a sandy base was obviously in order. Real sand was out of the question since the grains would not be in scale. So, I properly mixed a batch of Durham's Rock Hard Water Putty and slapped in onto the wooden base. I used a popcicle stick to dab the wet putty and create some texture. When that dried, I airbrushed a tan color followed by darker tones of that color for highlighting. | 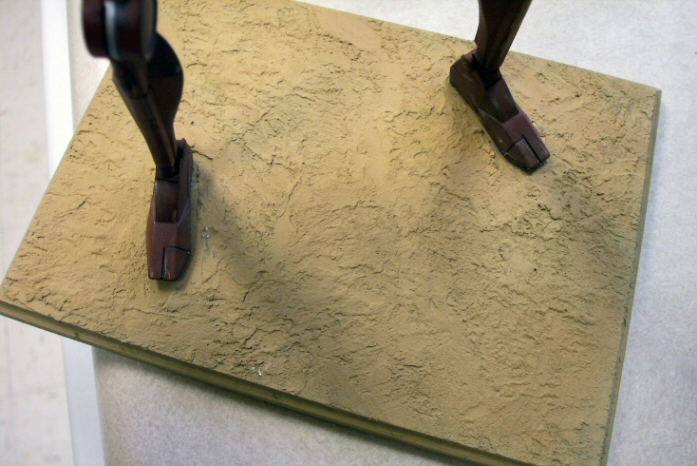 Base |
     |
| - All in all - |
| AMT did an outstanding job replicating this subject! There are quite a few versions of Battle Droids seen throughout the prequels that you can assemble this kit to look like. A fun model that's easy to put together...pick up a few! |
 |
| © Copyright 2005-2014. All photos of actual models are property of Joe Jimenez and cannot be used without permission. |