
|
|
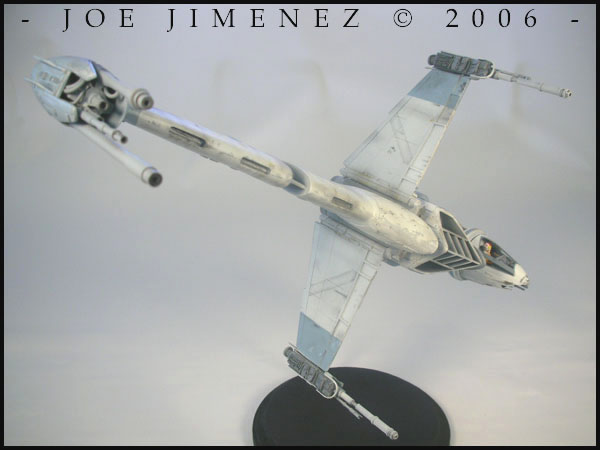
The B-Wing...a weird but cool looking Star Wars rebel starship. It's limited screen time in Return of the Jedi does not stop it from being one of the most wanted model kit subjects. Like many others, I barely missed out on SMT's offering. This time around, I was very lucky to be able to acquire an early copy of the Blue Moon B-Wing for the purpose of a review for Starship Modeler. |
| - the kits - |
| The kit was mastered by the talented Alfred Wong, who if you don't know, originally mastered it for Scale Model Technologies (SMT) a few years ago. The kit is really gorgeous and was beautifully cast by Blue Moon. The resin used is of good quality and a dream to work with (sanding, scribing, etc.). The overall size, at approximately 1/41 scale, is big enough to appreciate while not being a shelf hogger. | 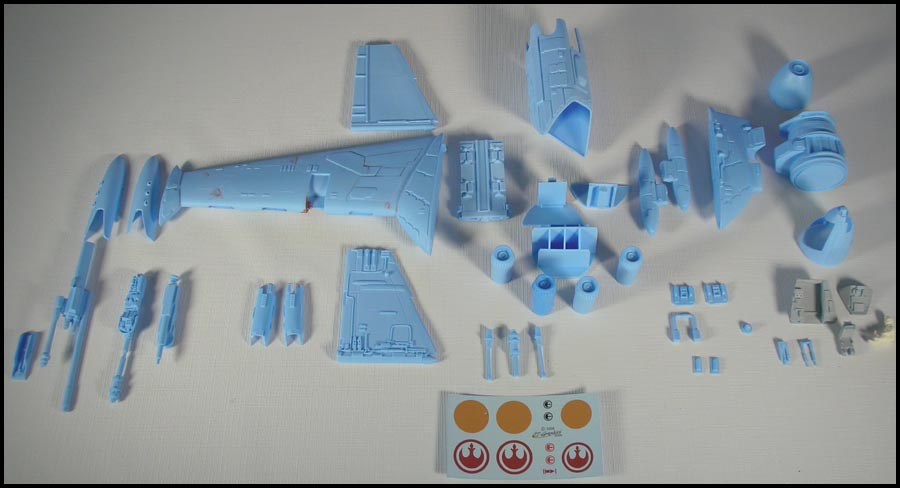 Parts  Part Close-Ups |
| Accuracy is probably going to be the only potential drawback of this model for some. The basic shape is correct and while changes have been made on this version to make it look more accurate, several small greeblies throughout still do not match the studio models. |
| - clean-up - |
| Clean up was a charm. I only found two tiny air bubbles, virtually no flash and mold lines were easily sanded. Be careful though, the resin is so easy to work with that you could easily over sand an area. A few warped parts were heated with hot faucet water, repositioned and dipped in cool water to hold the new position. Putty was used to fill some mold lines and also to fix the sink spots at the ends of both inner sides of the main fuselage facing the engine. | 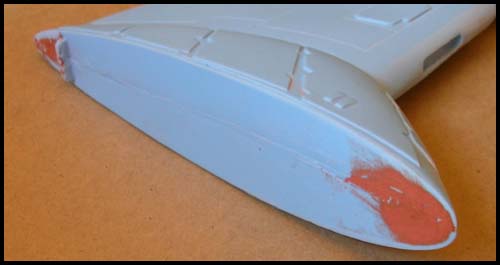 Putty Work |
| I went over any panel lines with the back side of a brand new #11 X-Acto blade. Also, some edges on the raised panels were filled with resin so I took the same knife and cut out any excess. This made soft looking detail look sharp again. A couple of areas had a bit of an orange peel texture but fine wet sanding took care of this in no time. |
| - panels & added detail - |
| According to the reference I was looking at, I noticed that a few raised panels were missing in several places around the model. I added such details by first drawing the panel on the part itself with a pencil and then using painter's masking tape to trace the outline. I then transferred that onto .020 sheet styrene and cut it out. Not every added panel is accurate but it's fine with me as long as it looks like it belongs. | 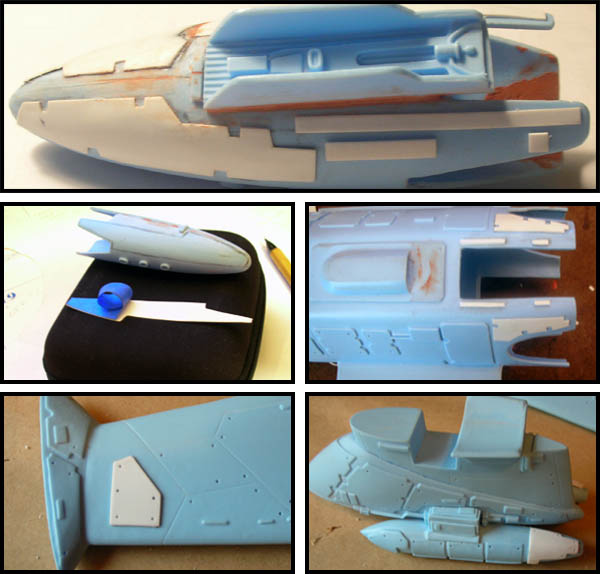 New Panels 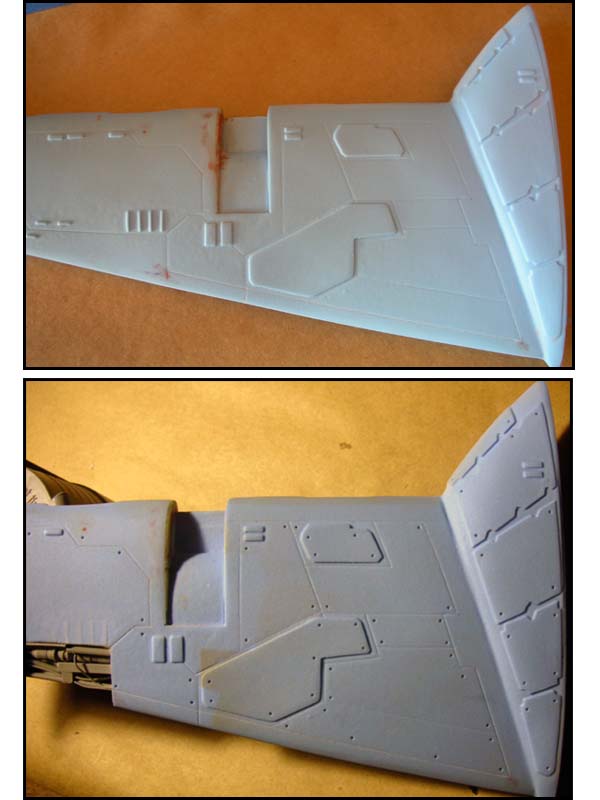 Rivet Holes 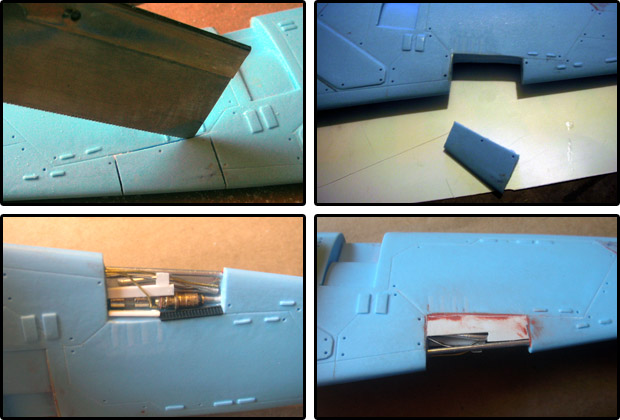 Added Detail  Wire Detail |
| While working on the panels I decided to add rivet holes. I marked the locations with a pencil and then took my 1/32" drill bit inserted in a pin vise and went crazy. At the time of drilling, I hadn't yet found reference on the exact locations of every hole so I went with what looked best. I strongly feel that this simple change alone will make for an even better looking B-Wing! | |
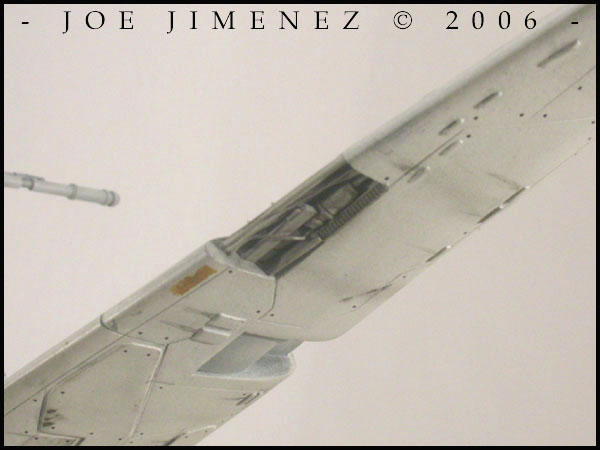
| There's an area along the trailing edge of the main wing that's exposed on most references of the movie model. Since this lends to the appearance of a used universe Star Wars is so famous for, I knew I had to replicate this on my model. Lines were drawn and a chunk of resin was cut out using my hobby saw. Aluminum tubing, strips of styrene, thin wire, a small fuse, an old tire valve core, and a piece of zip tie were all used to somewhat match the look of the studio models. A piece of thin sheet styrene was then cut to shape and used as the "upper side" panel extending from the fuselage. | |
| The four winglets on the main airfoil were too soft in my opinion so I shaved them off and made new ones from sheet styrene. I only added new ones to the top side of the wing since the studio model only shows them on this side. Finally, I went ahead and added cable detail using thin wire and tiny drops of super glue to hold them in place. |
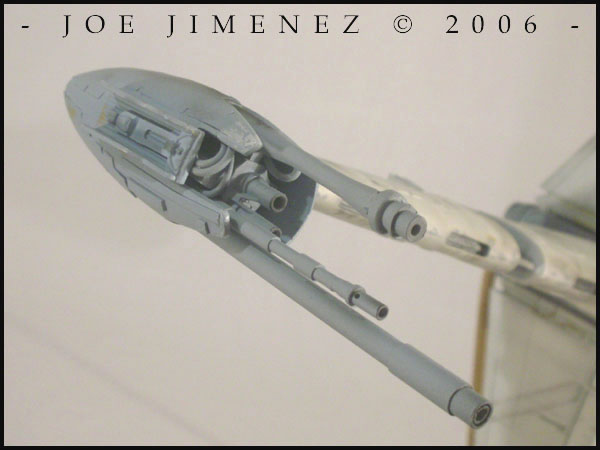
| - weapons pod - |
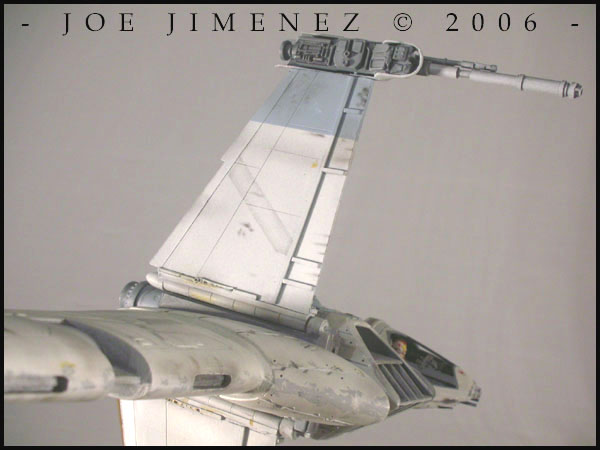
| The weapons pod at the end of the main wing is the most visually interesting part of the B-Wing for me. The cannon assembly piece and pair of targeting sensors make up the main gun assembly. Although all is molded well, I chose to make adjustments to more closely resemble the props. |
| I started by cutting off the longer main cannon and replaced it with aluminum tubing. I scrapped the two separate targeting sensors and instead fabricated a single, shorter gun barrel. The cables seen on the actual models were replicated using insulated wire. The top cannon has a nice taper to it so I left it alone. | 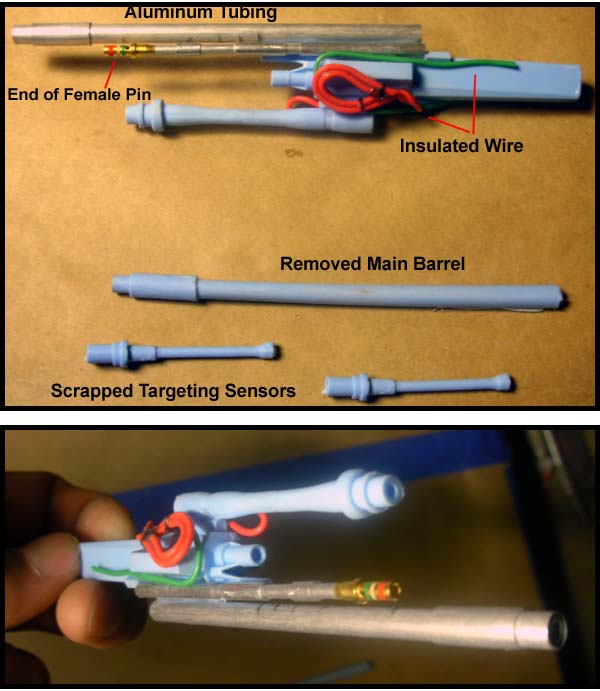 New Guns |
| - s-foils - |
| The s-foil sub-assemblies come with three pieces, the wing itself, the gun cover and gun base. I chopped the barrels up on the gun base just like I did the gun pod. Various diameter tubing went into constructing the two main barrels. I also cut little wedges for the gun tips. | 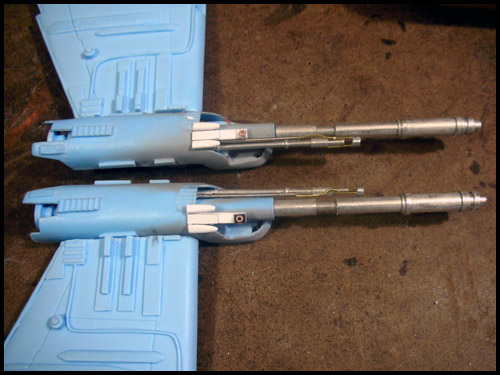 New S-Foil Guns 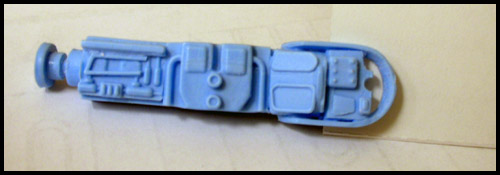 Excess Resin 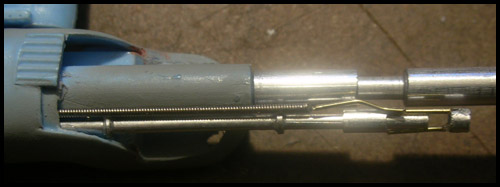 Small Barrels |
| The forward area of the gun bases is meant to be open so I took my pin vise and drill bit and cut out the excess resin. The part looks so much better after doing this! Any leftover resin can be shaved off with a hobby knife. | |
| The reference I was looking at showed a smaller gun barrels next to the main s-foil barrels. I took some aluminum tubing, guitar string and copper wire to fabricate these details. It was a bit of a pain but this adds so much to the model. | |
| Finally, I scratch-built some detail at the base of the gun barrels using stripes of styrene and the tips of thin tubing cut off carefully with my hobby saw. |
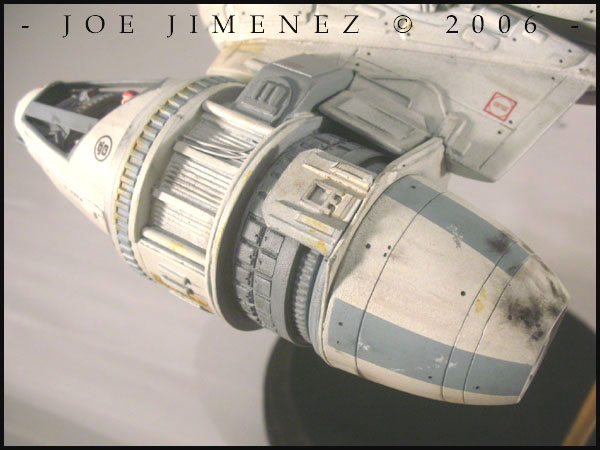
| - gyro-scopic collar & cone - |
| I was running on a self-assigned deadline so when it came time add detail to a specific area on the gyro-collar, I used supplies that I had on hand rather than go out and find the most appropriate materials. The area in this case was a trench running around the forward end of the collar. I used a strip of thick patterned styrene sheet to somewhat mimic the look of the film miniatures. It's nowhere near correct but I am still happy with the result. | 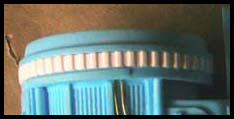 Gear Detail 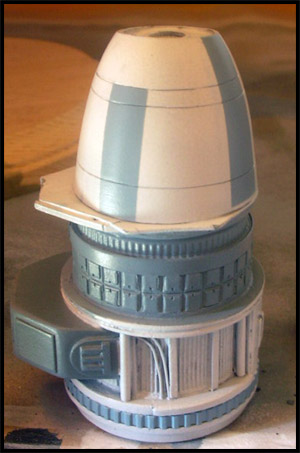 Added Squares 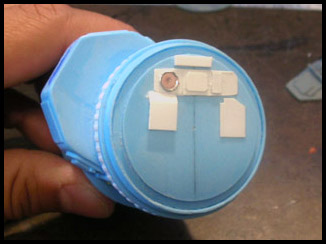 Rear Cockpit Wall |
| Moving down towards the back of the collar, you'll discover new detail on this kit in the form of scribed squares. The SMT offering had straight horizontal lines which didn't really match the ILM models. The new detail is nice and crisp, however, I went ahead and added smaller squares cut from sheet styrene to further intensify this part of the model. | |
| The aft cone piece has no panel lines so I had to scribe those in and drill rivet holes, as well. Scribing was accomplished by wrapping the cone with pieces of Dymo tape, making sure things were aligned correctly with my caliper. The piece is very thin and hollow so be careful if doing this, you don't want to scribe too deep. Finally, I finished things up here by adding simple detail cut out from sheet styrene for the back wall of the cockpit interior. |
| - cockpit - |
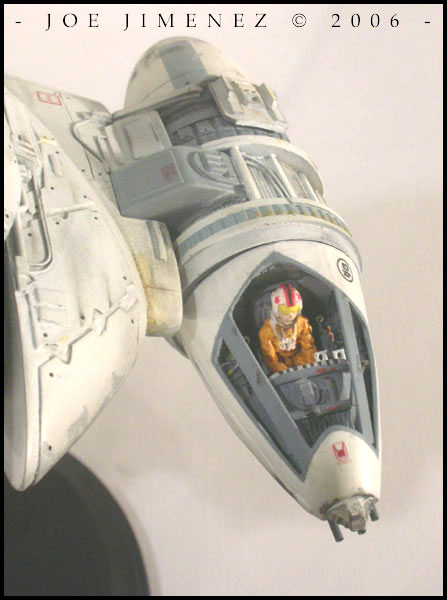
| The cockpit comes detailed but I wanted to really get close to the look of the actual movie models so I set out to detail this area as best as I could. I started out by cutting off a square piece of resin from the edge of the dashboard. I replaced this with a longer, thinner strip of styrene. Other bits and pieces included a piece of electrical pin, guitar wire and modified tank pieces for levers. | 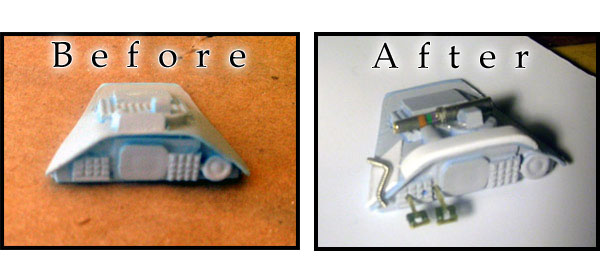 Dashboard  Interior 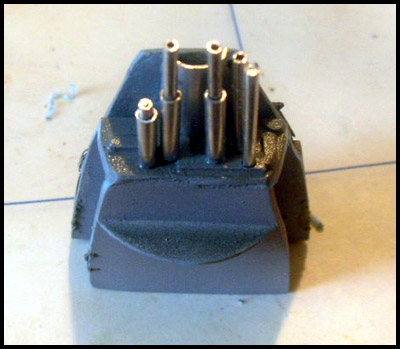 New Chin Guns 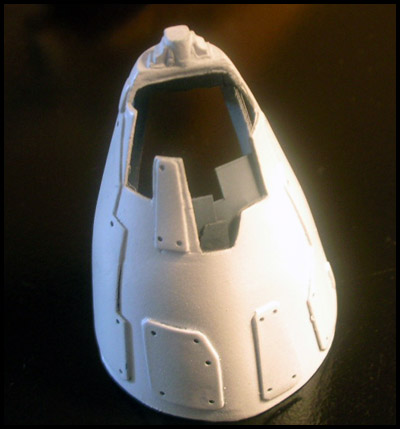 Extra Paneling 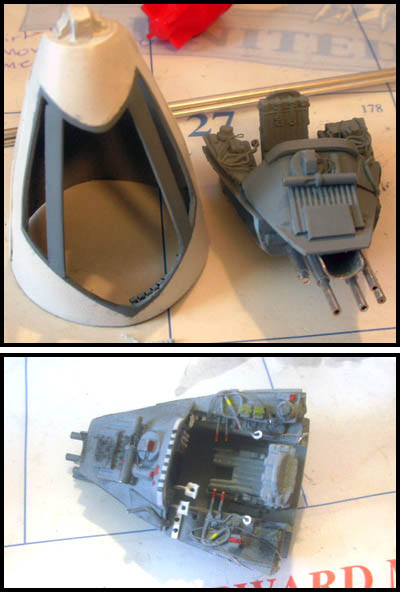 Painted Cockpit |
| Both side consoles received an extra deck of instruments created by first cutting pieces of sheet styrene. Model railroad parts and thin wire were then installed on top of these decks to simulate details in these areas. Please keep in mind that the kit does not come with a pilot figure but one was provided from another casting for the purpose of the review. That being said, it's quite understandable that the pilot did not fit so well in the cockpit. When seated, it sat way too high so I sanded his arse down as well as the bottom and back of the seat. | |
| At the time I was working on this part, I had not yet received the kit vacuum-formed canopy since they were still being produced. To stay on track, I decided to scratch-build the pair of beams that run over the canopy. I also added panel detail to the underside chin gun opening. | |
| I wasn't too impressed with the kit supplied chin guns so I opted to build my own using aluminum tubing. Aside from the four guns, I also installed a chopped up half of larger tubing behind or above the chin guns. If you look closely at your reference, you'll see what I'm talking about. | |
| Once I was satisfied with the outcome, I went ahead and painted the cockpit interior and exterior. Not perfect but a nice little effect, I would say. |
| - engine housing - |
| The kit was mastered by the talented Alfred Wong, who if you don't know, originally mastered it for Scale Model Technologies (SMT) a few years ago. The kit is really gorgeous and was beautifully cast by Blue Moon. The resin used is of good quality and a dream to work with (sanding, scribing, etc.). The overall size, at approximately 1/41 scale, is big enough to appreciate while not being a shelf hogger. | 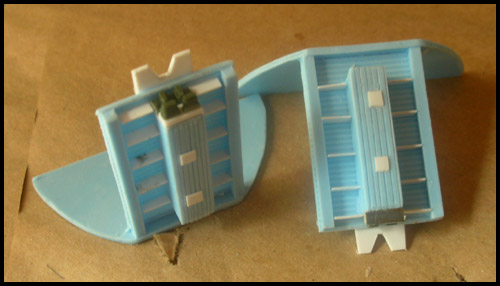 Aft Engine Detail 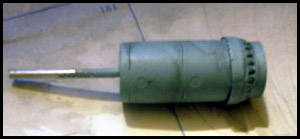 Thrusters |
| The thrusters had to be pinned with tubing in order to allow them to protrude out of the back opening of the engine housing. These were painted and installed after I mounted the model. |
| - painting & weathering - |
| Painting was done in sub-assemblies. I started with Plasti-kote gray primer, followed by a black base and then flat white. Certain areas were masked off and sprayed with a few custom mixed blue-grays. I sealed the paint with a few coats of Future to protect from the weathering process coming up. The pilot was painted using Floquil Orange and various acrylics to get the details. | 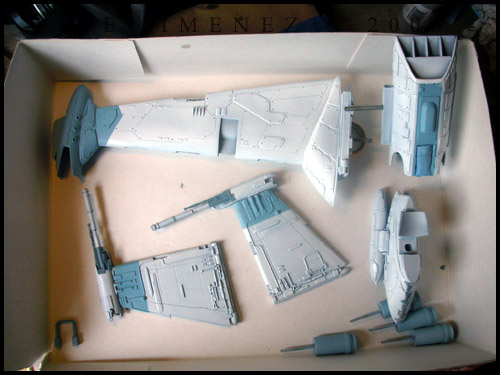 Painted Sub-Assemblies |
| I used my 10 year old pastel set to initiate the weathering. I'd mask off panels on the main wing and touch the edges to simulate individually worn panels. Streaks and burn marks were mainly created using Tamiya's Weathering Master Set B (mainly Soot) which I picked up at the SSM table at Wonderfest. A great product, I don't know why I didn't get a set a long time ago! |
| To further add realism to the burn marks, I carefully dabbed them with ground black chalk pastel with a fine wet brush. I'd then take a paper towel and very gently pat the burn marks to soften the pastels up a bit. Gray pastels in the surrounding areas helped blend everything together. Rust stains were made by dabbing Floquil Orange and wiping with a paper towel or cotton swab. The airbrush was minimally used to create some of the stains on the gun pod. |
| - mounting to base - |
| I usually see B-Wing models being mounted vertically. I wanted to try something different but I had to take into consideration the weight of the main wing. I once read a SMT B-Wing build-up where the author inserted a piece of wood into the hollow engine housing. I did the same, using balsa wood and threaded rod. 5-minute epoxy was applied to hold the weight bearing joints together including the brass rod inserted through the back of the engine. I wanted to capture a more dynamic pose, hopefully I did just that. |
| - DECALS - |
| The kit includes quality decals but they are not accurate for the B-Wing I was building, unfortunately. I paid DecalPaper.com a visit and ordered a mix of transparent and white paper. I don't own an ALPS printer which actually prints white so getting a mix of paper was necessary. I used Photoshop to create the images and then re-sized them with CorelDraw. The decal's are a bit thick but aren't noticeable unless you look really close. They aren't 100% in scale nor 100% accurate but they do add a nice touch. | 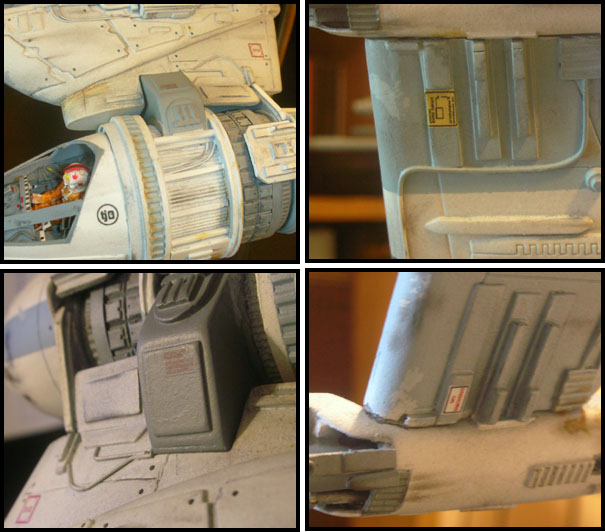 Custom Decals |
          |
| - all in all - |
| I almost wet myself when this sucker finally arrived to me after a couple years of throwing pennies into ponds and wishing that this model would be re-issued! Get one while the getting is good...you owe it to yourself!! |
 |
| © Copyright 2005-2014. All photos of actual models are property of Joe Jimenez and cannot be used without permission. |