
|
| - weathering - |
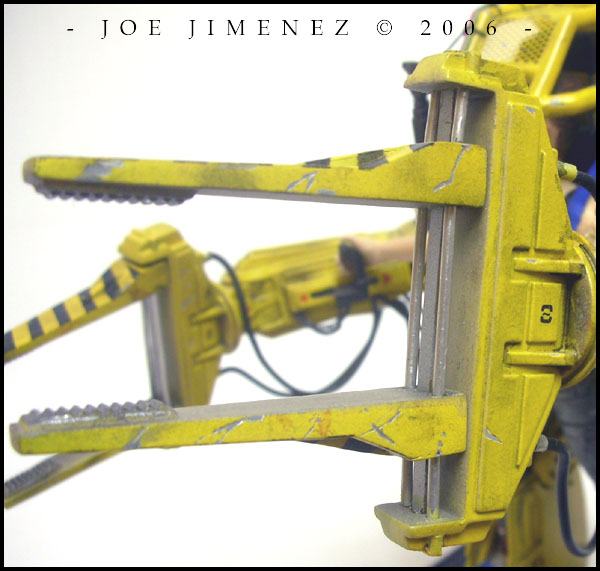
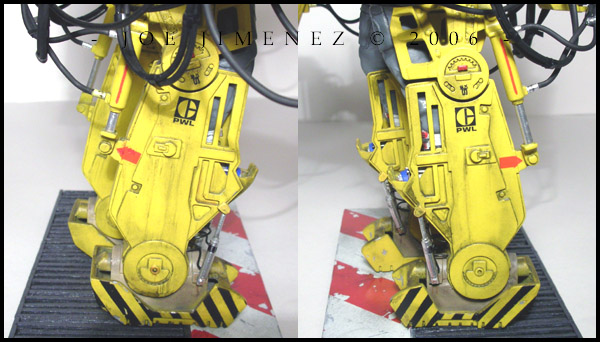
| This here was the best part of the build! Although you may not agree (and that's perfectly okay), I feel like I am getting weathering down. I wouldn't say it's the quality, rather, I've finally settled on a few certain methods that I feel comfortable with. | 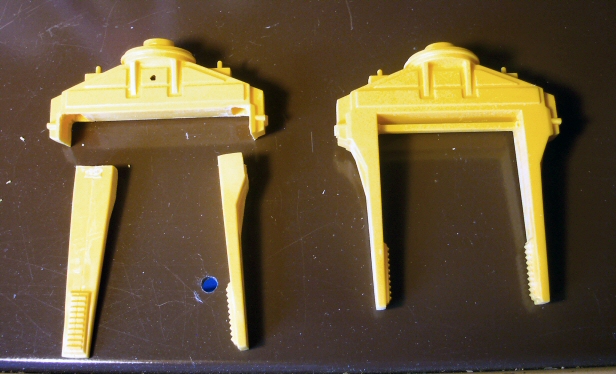 Cutting Out Forks |
| Anyway, I originally thought the loader was very clean on-screen but after a close examination, I realized that I was wrong. I used the Aliens DVD and photos of the actual loader from the movie as reference. While I needed to replicate the dirty look, I also had to be careful not to over weather it! |
| I start by using a new #11 Exacto blade to scrape up certain areas of the paint. Go easy on this part...less is more. |
| For a wash, I simply mixed a tablespoon each of black and gray acrylic paint followed by approximately 2 oz. of water and about 5 drops of dishwashing liquid. I prefer carefully painting this into the cracks and recesses rather than slop it on everywhere. A slightly damp cotton swap is used to carefully remove the excess after about 5 minutes. |
| Dust and dirt is done with a mix of black, gray and brown ground chalk pastels dabbed on with a short bristle brush. For leaks and streaks I dip a small fine brush into the wash and soak up the excess with a paper towel leaving the bristles almost dry. I'll then carefully swipe the area with a quick downward stroke using both hands to keep things steady. If the brush doesn't go where I want it to, I simply "erase" the stray marks with a cotton swab and try again. |
| To complete the effect, both the wash and pastels are used to recreate heavy oil and hydraulic fluid stains. I'll slop on a bit of wash to an area. When this is just about dry, I go over with the ground pastels. This creates a nice and controllable stain...as if stains are nice! It's good to throw in some really thin burnt umber paint to help give the effect of dry and dirty hydraulic fluid since this kind of fluid is usually red. Lastly, silver paint is mildly applied to some of the scrapes. |
| - surgery for ms. ripley - |
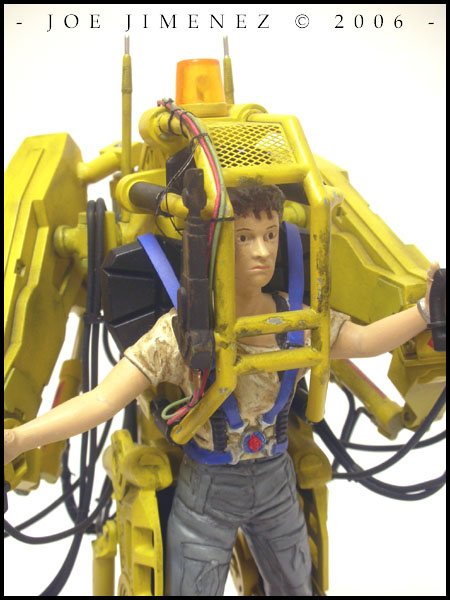
| Ripley's limbs needed readjusting to fit into the new loader pose. I wanted to knock this out of the way before I installed the hoses to prevent accidentally damaging them while handling. | 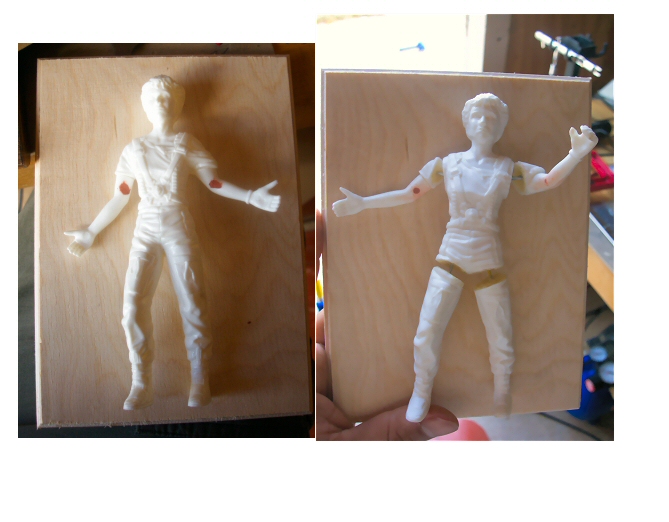 Ripley In Pieces |
| I began by chopping off and re-adjusting all of Ripley's limb. To keep things simple, the legs and body were filled with Mountains in Minutes expanding foam. Once dry, I shaved off the excess and installed wire into each limb. This way I could manipulate the pose while not having everything falling apart. Once satisfied, I super glued the wires and was left with a new permanent pose. The voids were filled with epoxy putty and the fabric folds recreated with Super Sculpey. Late in this stage I went ahead and chopped Ripley's head off so that I could reposition it because it just wasn't facing the way I wanted. |
| Now it was time for painting. A white primer base was sprayed on followed by custom mixed acrylic colors for the skin, pants and hair. The shoes and shirt I simply left primered. Future floor finish was used to seal and protect all previous work. I used a liquid mask made by Ambroid throughout the process that I was not to happy with because it kept sticking to the model and was a pain to remove. |
| Before beginning the weathering and detail painting, I took the time to extend the seat harnesses. These were made by cutting strips of very thin sheet styrene and super gluing on. I made some very small pits with my Craftsman rotary tool so that the strips of styrene could sit flush with the kit belts. Any seams were puttied and sanded. |
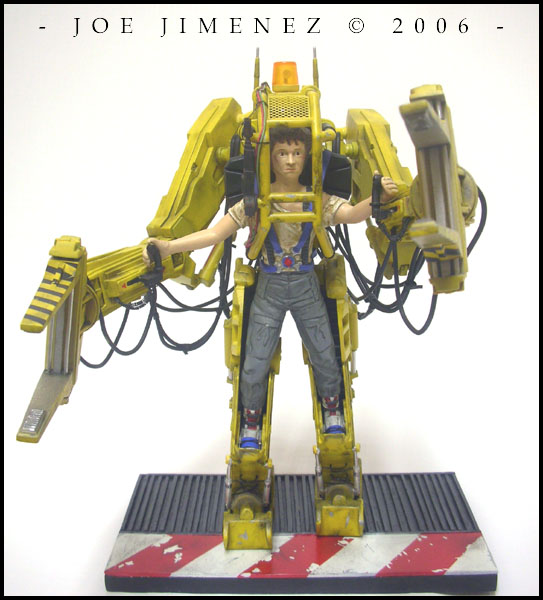
| With detail painting such as the shoes, belts, eyes, scars and watch complete, I moved on to weathering. Acrylics were used for the various shades of washes. All my work was then sealed with a few thin coats of Model Master Flat Clear. I made some mistakes and if one were to inspect the figure, I'm sure they would find things wrong. However, for it being my first human figure model, I think it turned out better than I expected and am really happy with the result. Now if someone could just fix that mug and make it look like Sigourney Weaver. |
| - room for details - |
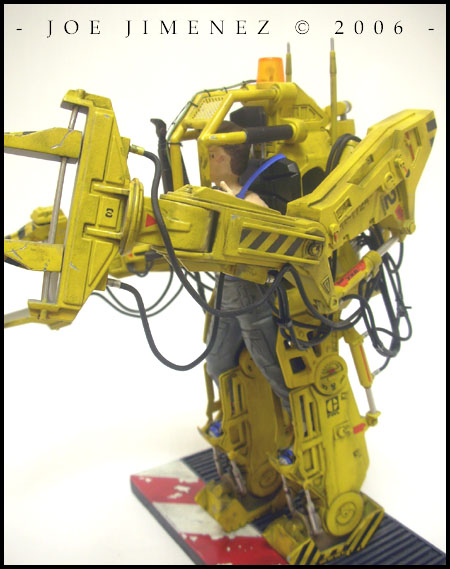
| Here's the part of the build that brought everything together. First up is the cables for the controller grips. I simply wound very thing gauge floral wire around another slightly thicker wire to simulate that curly phone cord look. I think this alone adds so much realism! | 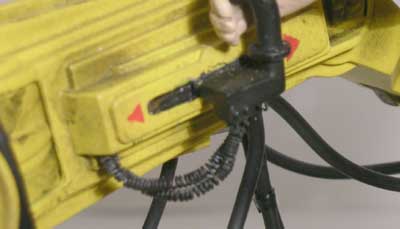 Grip Cables  Struts |
| The feet hydraulics provided in the kit were trashed and scratch-built using different gauge aluminum tubing. The hydraulic lines were made with thin insulated black wire and those were stuffed into pre-drilled holes I made with my rotary tool. |
| Next came the blow torch and details. I used .020 gauge flexible wire to try and replicate the hosing. I started by bending the wire along the path I wanted the hoses to go and put them aside for priming and painting. When done, I put them in place and then used sewing thread to simulate the zip ties that hold the hoses and wires in place. A few modifications were done to the torch, the most noticeable additions being the pneudraulic connectors made from bits of copper tubing. |
| This next part, I think, is the most crucial especially if you plan to really make this kit shine. To help simulate the look of the main hydraulic hoses, I began by sanding the two kit supplied lengths of vinyl tubing with high grit sandpaper to take out the toyish shine. A tedious task but well worth it! Next, I cut up 40 bits of aluminum tubing for pnuedraulic connectors. Somewhere along the process, I found a simple way to add a sense of weight to the hoses. I inserted the same .020 gauge flexible wire I used on the torch into the hose into the vinyl tubing. This made the hoses predictable and easier to work with. I used the Aliens DVD as reference along with a very helpful site called Hall of Cool Stuff. Neither reference was the same so I focused more on the overall look rather than exact placement of each hose. Oh, and for the electrical tape that holds some of the cables together, tiny strips of actual electrical tape were cut up and put in place. |
| The last steps involved scratch-building the feet harness details. Non-insulated and insulated wire was used to recreate this area. The antenna rods were then glued in place followed by the rotating light. Lighting the kit would have been nice but I just wanted to finish this model. The base was made to somewhat resemble the Sulaco hanger floor. |
          |
| - all in all- |
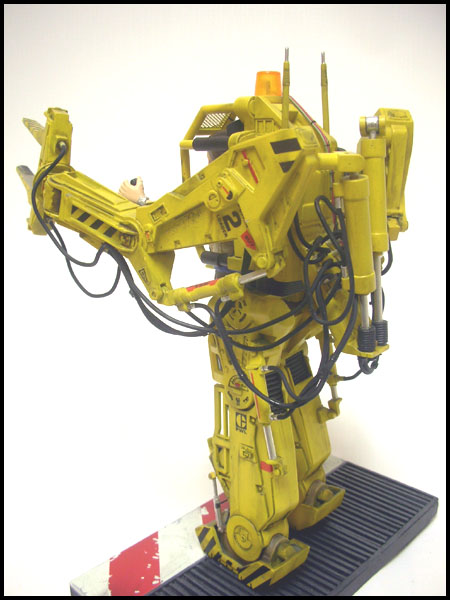
| I used the sewing thread technique to tear the feet out. A whole bunch of plastic was scrapped! I didn't have the correct diameter tubing so I drilled through a perfect sized wooden dowel. I inserted thinner tubing into that. A simple box was constructed underneath this and filled with Durham's Rock Hard Water Putty. Epoxy putty was used to cover the leftover hole at the bottom end of the legs. I only did this so that the armature that would hold the leg to the feet and ankles would be held solid. I re-did this area so many times until I felt it looked ok! I then added aluminum tubing to the "calve" pistons and the smaller ones on the "shin" area. The "shin" pistons had to be made to go with the tilt of the legs, one side being shorter than the other. Finally, styrene was added to complete the round ankle gear. Whew! A couple of headaches went into modifying the legs but I think it was well worth it. Building them straight out of the box meant leaving the whole kit looking very toy-like. |
| © Copyright 2005-2014. All photos of actual models are property of Joe Jimenez and cannot be used without permission. |