|
| I wasn't sure what I was getting into when I finally started assembling my first resin kit...or should I say kits. I always believed that resin kits were made for the highly experienced modeler only. That, and the fact that most of the resin kits I have bought were not cheap, kept these two kits locked up in the closet until I gathered the courage to start. |
| I was lucky to acquire a jmjmodels TIE Bomber and a BCI TIE Fighter. I saw the BCI TIE in modeler Tony Agustin's dio, 'A Deadly Trio', over at StarshipModeler.com and knew that I had to have one. Originally, I was going to build AMT's X-1 TIE Fighter (Vader's ride) as well, mainly so that I would only have to mix a custom color once. Unfortunately, a bad superglue accident didn't allow for that and it will have to wait a little longer. |
| - bases - |
| I began the whole project by first making the simple bases for the two TIEs using round bases bought at Hobby Lobby for about $3 each. The fighters needed to be centered over the bases as best as possible so the center of the base was first found by using a perpendicular bisector. This would be used as a reference point since the placement of the rods would actually be placed off center to allow both models to sit directly over and centered to the base. I mounted the TIE Fighter by drilling a hole on the back of the cockpit rather than the bottom. A quarter inch brass rod was bent and fixed to the base and model. The TIE Bomber was a bit easier since I only needed to drill a hole under the center box connecting the cockpit and bomb bay. By the way, before all this I measured the rods so that both models wing hubs were at equal heights to each other. | 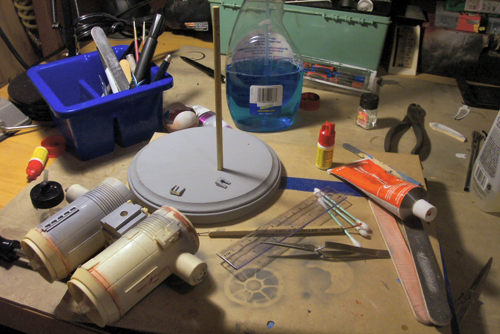 Base |
| - tie fighter - |
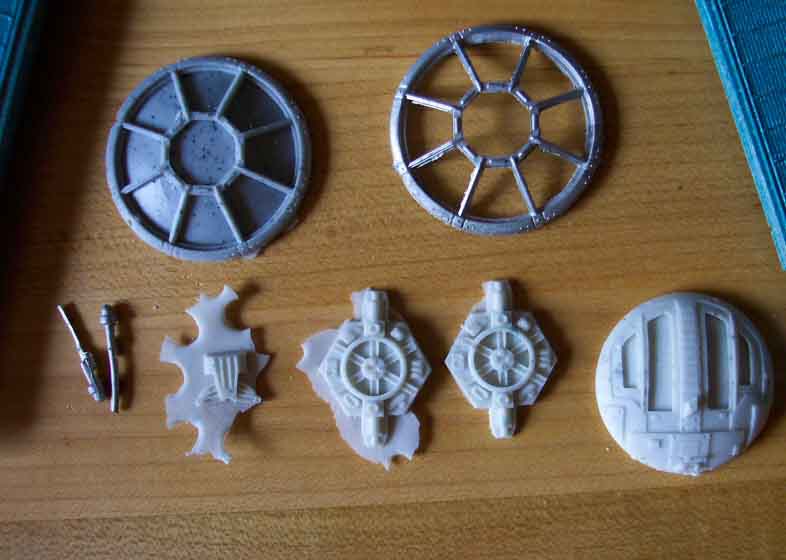
| The first model up is the BCI TIE Fighter. It's an excellent kit plagued only by a solid cast body, meaning no cockpit, and hundreds of bumps on the wings. I can deal with the cockpit but the bumps took patience to remove, which I was doing even after painting the model! |
| Despite the bumps, I was amazed with the detail, especially around the wing hubs. The overall size is what I really like about the kit, though. It's not studio scale but just big enough to really appreciate. | 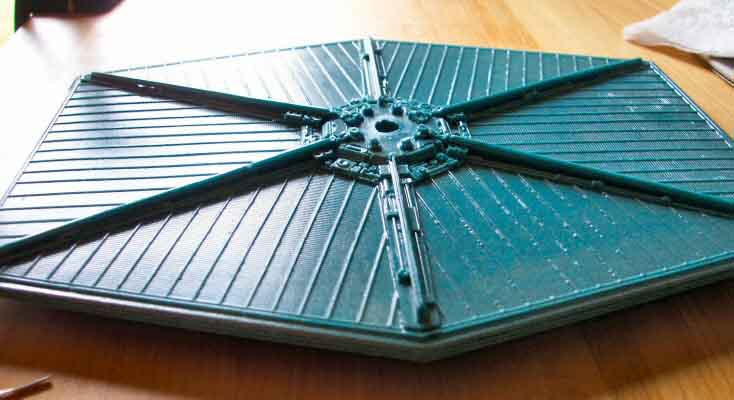 Bumps |
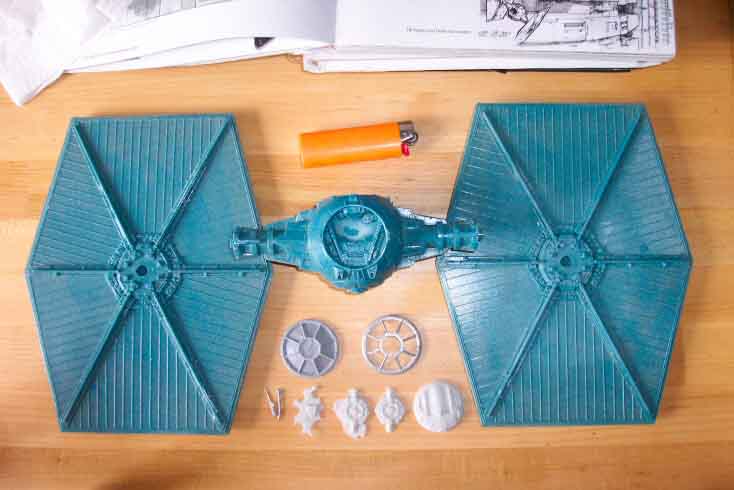    Kit Pieces |
| I did run into a few holes but filling them was not that hard. Assembly was very easy. The “hardest” part was drilling out the excess resin on the cockpit hatch. I followed T. Agustin's lead there. I inserted threaded rod for support of the wings when glued and aligned the wings so they were as straight as possible. I didn't want to use the kit supplied chin guns which are just recasts of Vader's AMT TIE. I built my own using aluminum and styrene tubing. I didn't assemble the window frame and cockpit hatch until all was painted. A few coats of Duplicolor gray primer were laid down and the kit was put aside so that I could work on the TIE Bomber. | 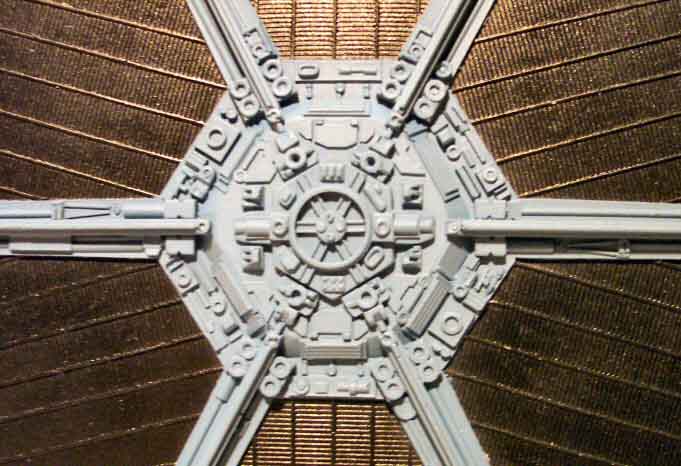 More Detail |
| - tie bomber - |
|
The TIE Bomber is probably my favorite Star Wars ship so I was really excited to finally get a chance to build one! My first reactions about the kit were good but I slowly began to find many areas that would need lots of work. |
| Pretty much all of the parts would need some kind of modification and heavy cleanup. I started production with the wings. Cleanup of these parts consisted of sanding the edges smooth. The strut pieces that came with the kits were terrible so I opted to make my own using different size aluminum rods. In the following pic, you'll see the kit supplied strut on the right. | 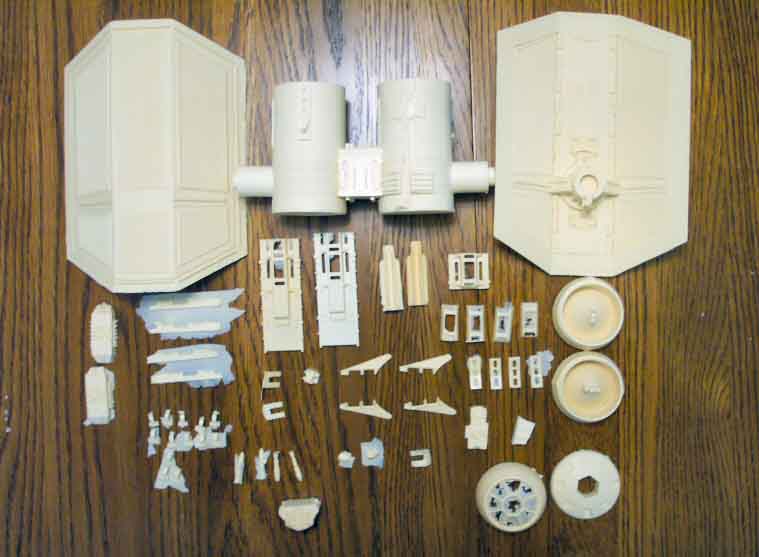 Parts 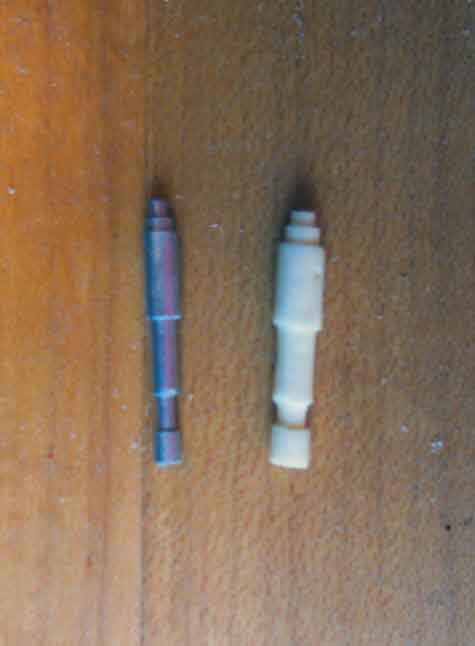 Scratch-Built Strut 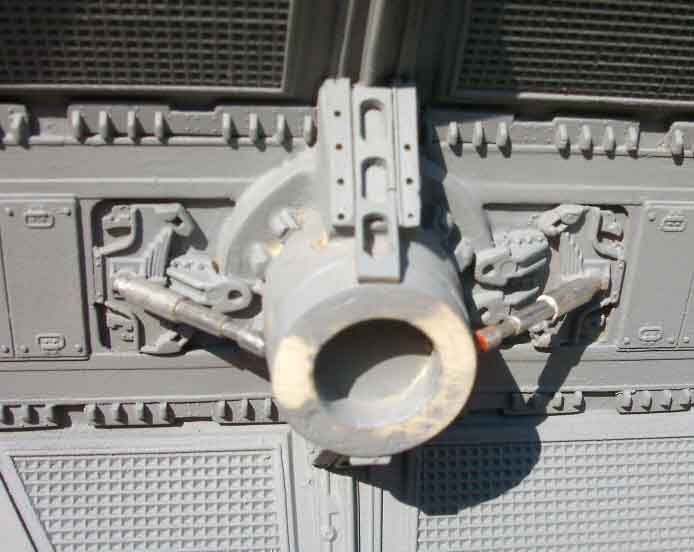 In Place  Scratch-Built Cockpit Detail (Not Used)  Problem Detail  Another Angle 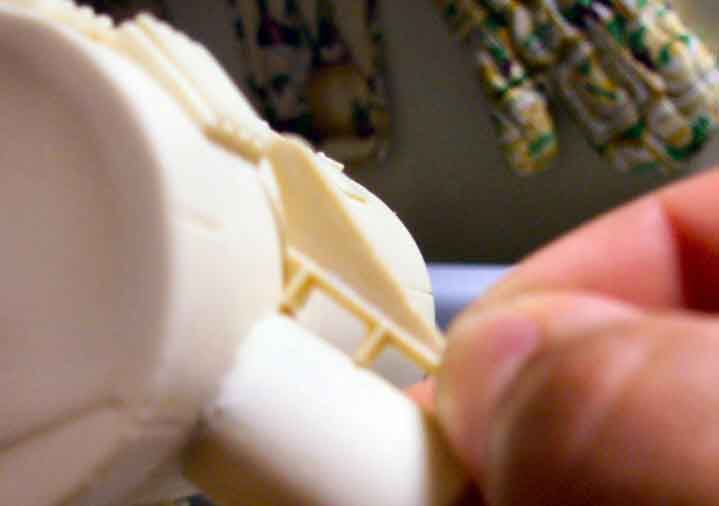 Fin Not FLush 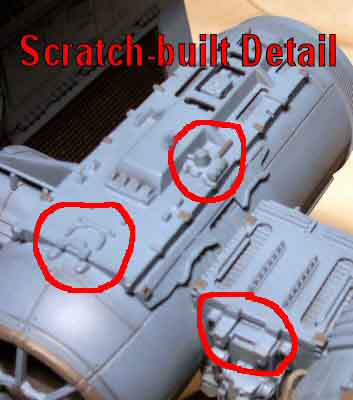 Scratch-Built Detail |
| I then slowly moved on to the fitting of the bomb bay front “dish” and cockpit frame. I scratch-built some cockpit detail and was going to add it but decided not to partly because ILM didn't and mainly because I honestly didn't feel it added to the overall effect of the model. I used auto epoxy putty to seal the seams of the bomb bay dish and cockpit parts and proceeded to scribe and repair panel lines where needed. The cockpit hatch pieces were then added followed by the rear thruster cones. These pieces were not flush with the rest of the main body, despite the fact that the ILM model was. I simply centered them as best as I could leaving an even lip all around. | |
| The pieces that really got to me were the fin like "whatchamacallems" stretching from the wings to the main body. For one, the lower right piece ( if looking head on ) was being blocked by molded detail that didn't seem to be in the right place. I decided to use my rotary tool cutting wheel to make gap in the molded-on piece allowing that piece to sit in comfortably. | |
| Both left fins were modified to the contour of the upper and lower cockpit hatches and the last one on the upper right was glued in place and puttied in. All fins were sanded to reduce the size. However, the upper left fin's top edge still touches the molded on detail atop of the bomb bay (originally the M3 Lee fender on the ILM model) when it really shouldn't. This doesn't really bother me, though. | |
| The base of the “pincher” pieces located at the missile hex port needed to be filled with putty in order to have a proper fit. The bomb sensor received some strips of styrene to fix the badly cast “I-beam” that connects the sensor to the body. I then cleaned and modified the “latches” around the front end of the bomb bay. The sensor, latches and wings were left off until after painting. | |
| Last, I went ahead and scratch-built some additional details that were missing on this kit. This included the wire detail and bulb-like things located on the front edge of the cockpit hatch. A couple other items were added to help make the ship look more like the movie version. Along with these details, I drilled tiny holes at random places on the panels to simulate panel screws. Oh, and I also scribed in some missing panel lines, mainly above and below the cockpit window. I chose to use super glue for all assembly. Also, I decided not to add windows on both TIEs simply because I don't like the effect with them on. |
| - painting - |
| I finally reached the painting process after three months (one month off). I started off by giving both models a good wash and coats of primer. I then painted the black areas of the wings and sealed with a coat of Future. Next, I began the time consuming task of masking all these areas after all was dry. A mixed dark gray color was then used for the window frames, Bomber latch pieces and various detail. |
| I was really cautious of what color I would use for the main bodies since I wanted something close to the blue-gray TIEs of EMPIRE and RETURN. As always, I used Delta Ceramcoat paints. After many mixes and test attempts, I finally found the right color! To keep things simple and since Ceramcoat paints come in dispensable bottles, I counted drops when mixing. Ultimately, I used 40 drops each of Blue Jay, Ocean Reef Blue, Quaker Gray and 14 drops of Black. It's a great color in my opinion. At first I thought it was a bit too dark but after hitting it with some good light from a lamp and taking a picture, I noticed that what I got was a similar looking TIE as in most of my reference images which consisted of web pics, Star Wars books (Star Wars to Indiana Jones and Star Wars : Technical Journal) and the flicks themselves |
| I ended up needing two batches for both ships. I went over all nooks and crannies, making sure not to leave bare areas. My first attempt at pre-shading was hidden due to the light color chosen to pre shade and my many coats of the main color. So, I decided to add some subtle weathering afterwards using pastel chalks. I used a medium gray and brushed it into the panel lines of both kits with a very light touch. I went over with a coat of Floquil Clear Flat to seal everything up but unfortunately, I was left with a slightly moist coat. It didn't smear but felt wet, as if sweating, when handled. I couldn't figure if this was the result of high humidity in my area or not washing it well. I remedied this by laying down a few coats of Model Master clear flat. |
| I masked off and painted the Bomber window frame and some detail on the Fighter. Again, I sealed with the flat clear and proceeded to assemble the remaining pre-painted pieces to include the Bomber latch pieces, bomb sensor and Fighter window frame. I touched up some areas on the solar panels of both ships that were chipped by my hobby knife when masking and painted the red tips of the exhaust ports. Finally, I drew in the panel lines on the TIE Bomber wing pylons. I take it ILM drew these in as well since they don't look like scribed lines. |
TIE FIGHTER 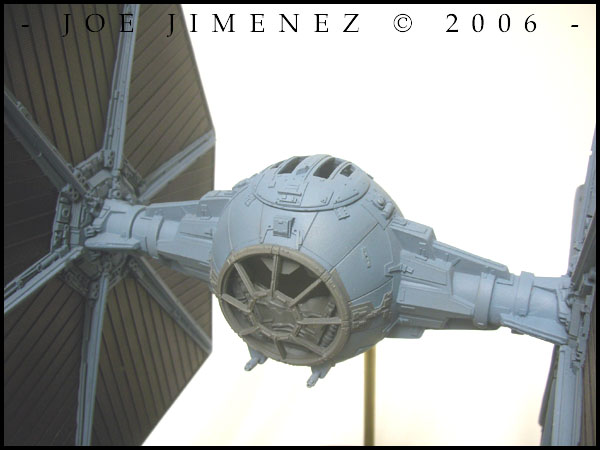 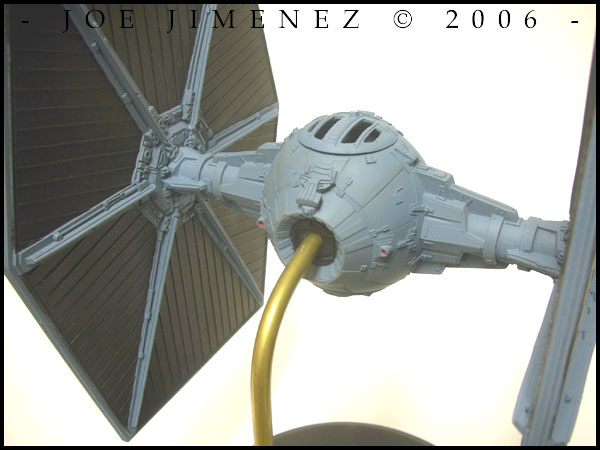 |
TIE BOMBER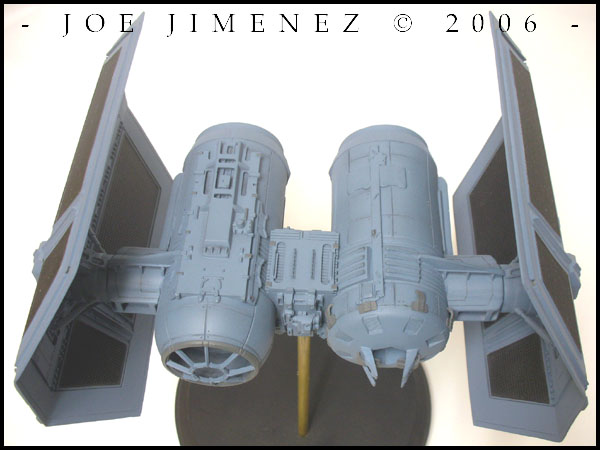 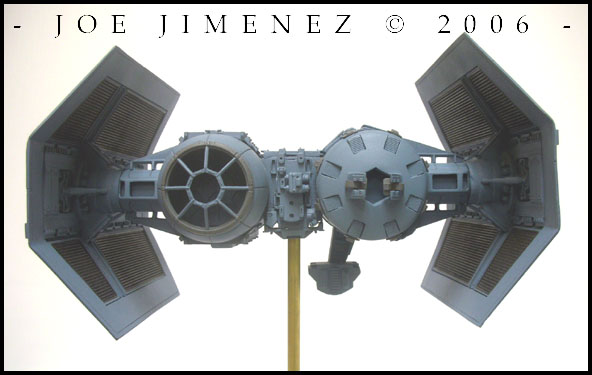 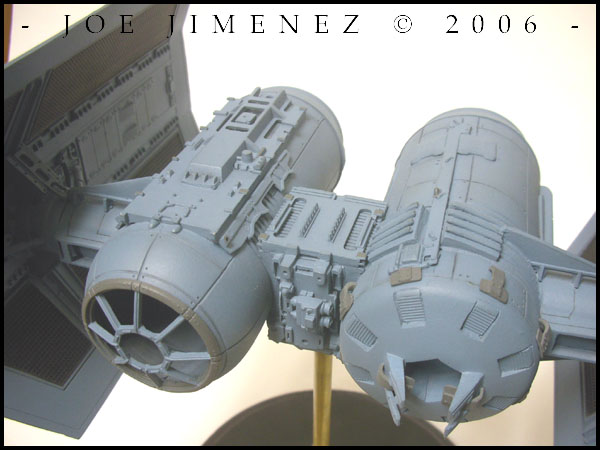 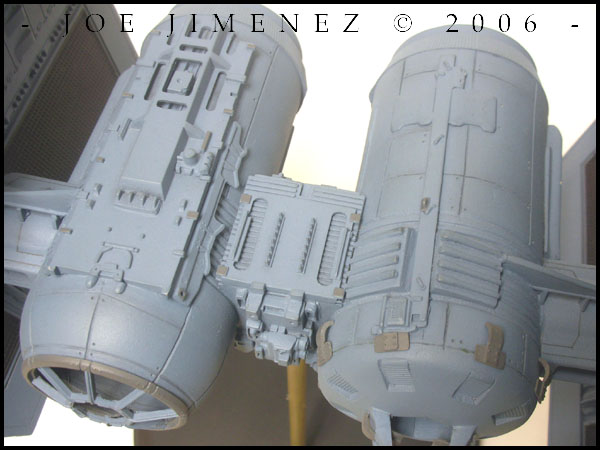 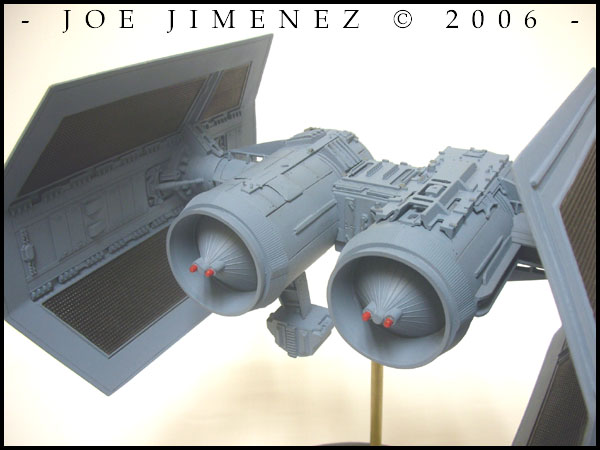 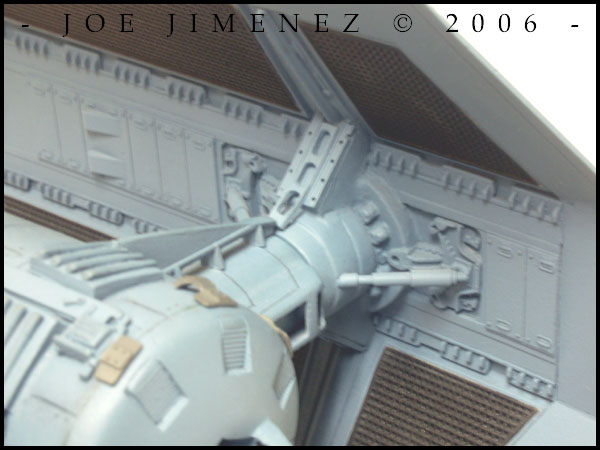 |
| - All in all - |
| Whew! It took a little longer than expected but in the end I was left with two models I am really proud of. This was my first stab at resin models and I couldn't be happier that they were two subjects from my favorite movies of all time! Thanks for reading! |
 |
| © Copyright 2005-2014. All photos of actual models are property of Joe Jimenez and cannot be used without permission. |