
|
| This here is a project that I put off even starting for four years! Despite repeatedly being amazed by other people's use of this common process in their work, I insisted on imagining the possibilites such a simple tool could yield for me rather than actually applying. Well, since my Pogo Droid project is relying on this technique to get finished I decided it was time to build my own vacuum forming rig instead of just reading about it. As you'll see in a bit, the few combined hours of work put into this project would definitely pay off! While not necessarily a build-up, I hope it still serves as inspiration to those who haven't ventured into this realm of our hobby. |
| - the whole process- |
| As you can see in the picture not a whole lot of expensive materials are needed to build a simple vacuum box. Same goes for tools. I guess I put this off for so long in part because I don't own any fancy shop equipment. Obviously, the more you put into it, the better it will be but I wanted this to be as simple a possible. | 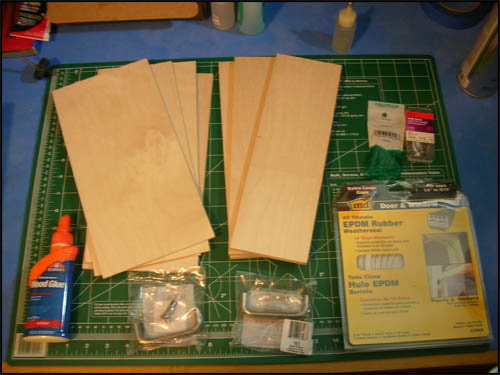 Materials |
| I used 6mm thick craft plywood to construct the box. It measures roughly 6 x 12 inches. The most important thing is to pre-drill holes into the wood before nailing or screwing the sides and bottom together. Also, use lots of glue! I used wood glue to seal all the corners. I recommend a thin coat on both joint surfaces before and 2-3 coats of glue per joint after assembly. You can't get too crazy with the glue so use it up. | 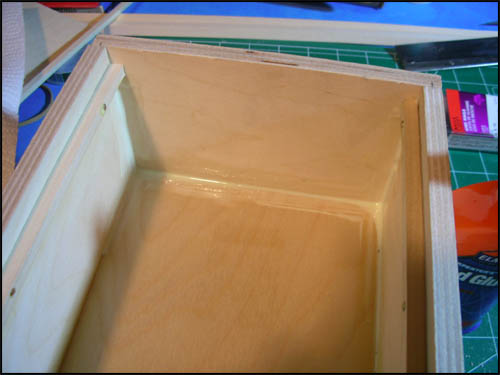 Making it Airtight 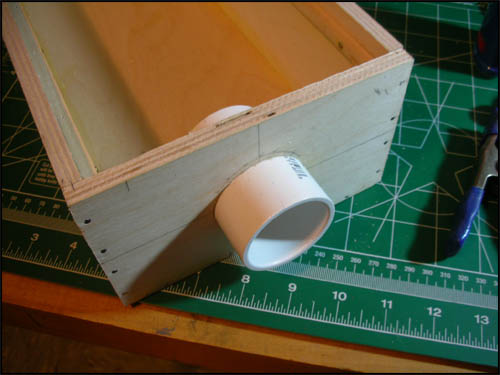 Tube 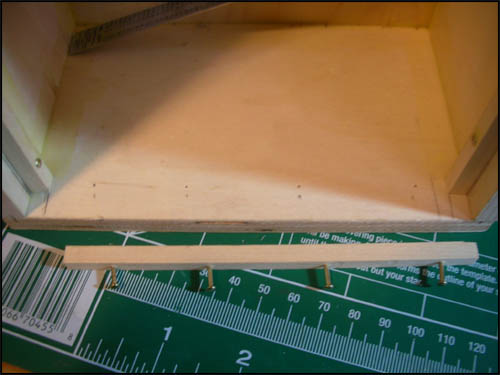 Lip 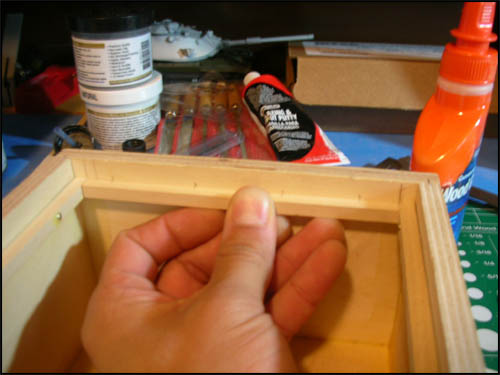 Perfect Fit |
| Next, I cut out a pre-measured hole into one of the sides of the box and installed the tube that will connect to the vacuum hose. You'll need to measure your vacuum hose to see what diameter tubing you need. I used a 1 1/2 inch PVC joint for this. Again, slap on plenty of glue around the seam. I used 5-minute epoxy on the inside for strength as this is the section of the whole rig that will come under the most stress. The seam facing outward received some Aves for a cleaner look. | |
| Finally, I installed a lip constructed of 3/8 x 3/8 inch wooden strips all around the inside of the box so that the soon to come drilled panel would have someting to sit on. When measuring the depth the lip would sit at, I took into account the thickness of the weather stripping and frame that I would be building later. |
| While doing research I discovered that one large hole in the center of the top panel and a layer of some metal mesh screen on top of that is sufficient to get a successful pull. I, however, prefer the look of the grid pattern so I took the extra time to draw out and drill each of the approximately 720 holes. Obviously, this was the most time consuming part of the whole thing. This top panel is half the thickness of the rest of the panels since I had to think about my drill bit when choosing the top panel. I didn't want to have to burn holes in due to a quickly worn out bit. Once done with the holes I simply dropped it into the box to sit atop the wooden lip. I then pre-drilled holes and hammered it into place. Again, glue was used before and after to help seal all edges. | 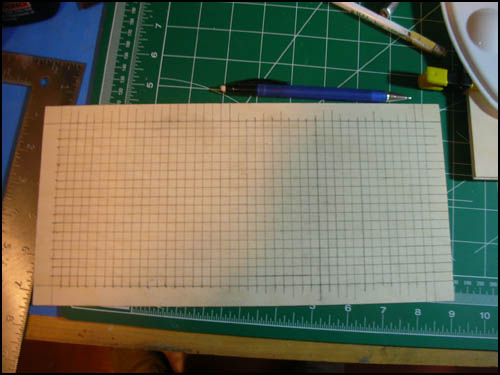 Grid Pattern  Drilled Panel |
| Next came time to build the frame that would hold the plastic sheets. Two pieces of 3mm thick plywood were stacked and clamped together. I measured and drew the window and began by scribing a line around. This was done so that I had something to follow with my hobby saw making it easier to cut straight lines. | 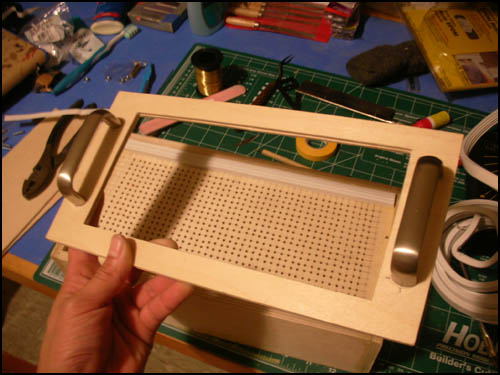 Completed Frame 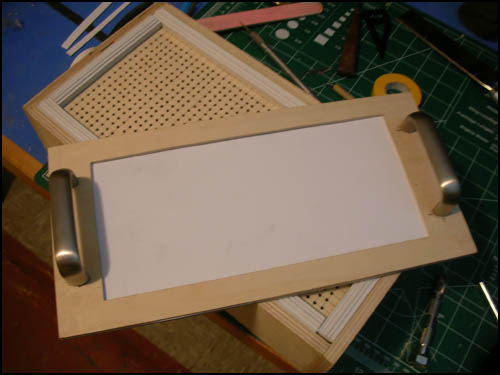 Frame with plastic |
| Once the windows were cut out I proceeded to install the handles which I found at my local Lowes hardware store. I pre-drilled holes and sawed off the ends of the screws that came with it to shorten them. I could have bought shorter screws but I was in a hurry. Once the handles are installed, the two frames will be held together so that a piece of plastic can be sandwiched in between. Instead of disassembling the two frame pieces, I only have to loosen the handle hardware and slide a measured piece of plastic in. |
| Inching closer to the end, now came the time to add some rubber weather stripping to help make the whole thing even more air tight during the most crucial part. This is self adhesive as most weather stripping is, I imagine, so it was easy to install. | 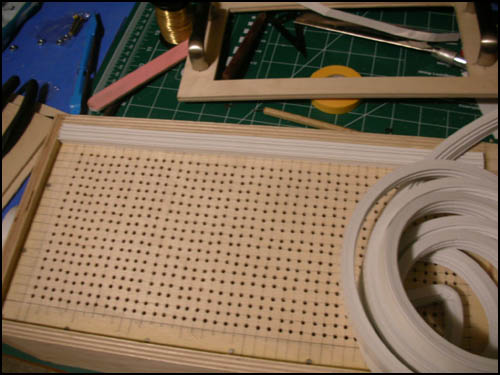 Weather Stripping |
| - the moment of truth - |
| WIth everything completed and allowed to cure, the moment of knowing whether this thing would work or not had finally arrived. I was worried about the vacuum since I was using our only regular house vac. Would it provide enough suction? Only one way to tell! The roll of 3 x 6 foot .020" styrene was ordered from USPlastic.com and appears to be more than enough for many projects to come. | 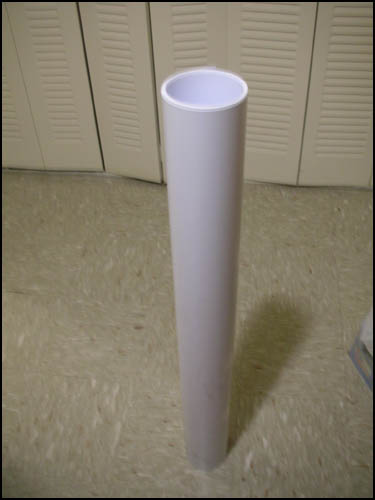 Roll of Plastic 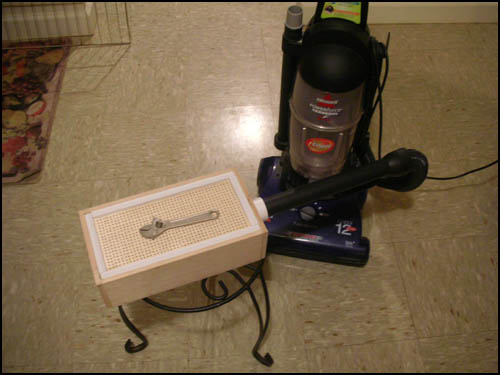 Setup ready to go. |
| One of my wrenches would serve as the guinea pig for this initial test. As I was heating up the oven to 350 degrees, I realized that I hadn't included a rack to hold up the frame during my planning. I improvised by using two opened and cleaned green bean cans. The cans and frame with plastic all sat atop a foil cookie tray just incase of a mess. |
| With the oven heated, I placed the frame in and waited for the plastic to heat up. I found Lasse Henning's tutorial very helpful during this moment. By the way, his website is what initially inspired me to want to build a vacuum form box. Like he said, the plastic quickly sagged and straightened out. About 1 1/2 minutes later it very slowly started to sag again. I quickly took the frame out (with gloves of course) and carefully placed it over the wrench. A flip of the switch on the vacuum and to my delight, the soft plastic was sucked down all around the wrench! After 20 seconds of smiling and allowing the plastic to cool, I turned the vacuum cleaner off and popped the wrench out. To my satisfaction everything worked just as planned! | 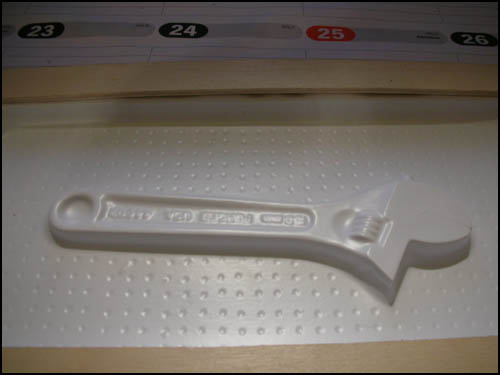 Success! |
| - one very happy joe - |
| So there you have it. After fours years, all I needed was a few combined hours of work and some simple materials and bam!, my own vacuum forming machine. I encourage you to build your own box if you haven't already done so but please keep in mind the hazards associated with this technique. Heated plastic releases toxins and playing with heat can burn. Therefore, excercise extreme caution. Kids, have an adult supervise while you do this. As with all things, a little safety and you'll be enjoying your very own vacuum forming box! Thanks for reading! |
 |
| © Copyright 2005-2014. All photos of actual models are property of Joe Jimenez and cannot be used without permission. |