
|
| For some time, I felt the need to prove to myself that I could create something original and see it through from start to finish. This is one of those builds that I believe is instrumental in the further development of what I like to call my "skills" and serves as a great experience! | ||||||||||
| - the concept - |
| Sometime in 2004 I found a plastic bowl at work. It was about to be thrown away but I kept it instead because of it's interesting shape. I like Maschinen Krieger and immediately imagined an Ma. K inspired vehicle of some sort. I originally wanted to do a four-legged spider tank but then I remembered something from an old Nintendo (NES) game. | 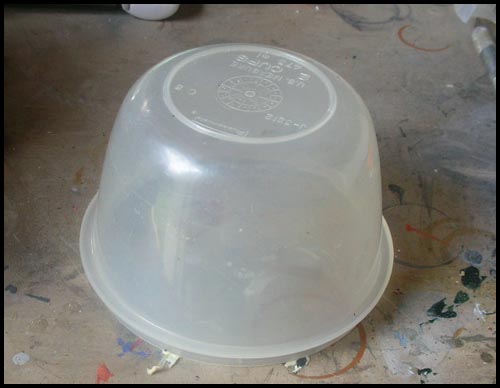 Eggman |
| The original Mega-Man game was one of my favorites as a kid. There was an enemy called Big Eye who usually hung out at the end of levels right before a leader; a pogo robot who hopped around intent on killing. It was that bozo that led to the final design of this droid. | Big Eye |
| In addition, many other things inspired this build...from Star Wars to builds by some of the very talented modelers around the internet. The main things here were to learn and apply. |
| - antenna dome - |
| The bowl was turned upside down and used for the main body. I started by drawing a grid pattern; this would help when the time came to add detail by keeping everything symmetrical. Next, I cut the bottom end of the bowl out and inserted a plastic hemisphere. This dome houses the transmitter/receiver so I cut a hole in the center for an antenna to stick out of. Detailing of the array dome was accomplished with some strip styrene, t-bar and a metal hardware. | 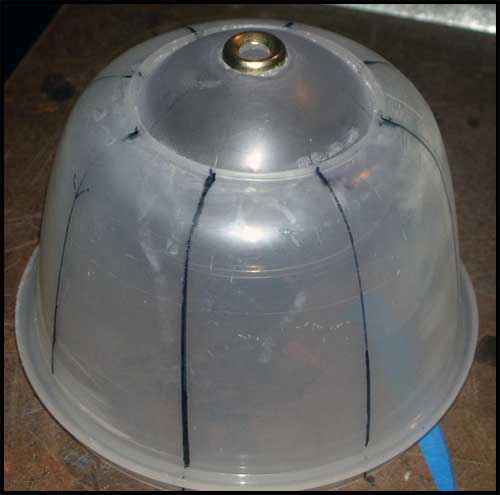 Drawn Lines  Antenna Dome Detail 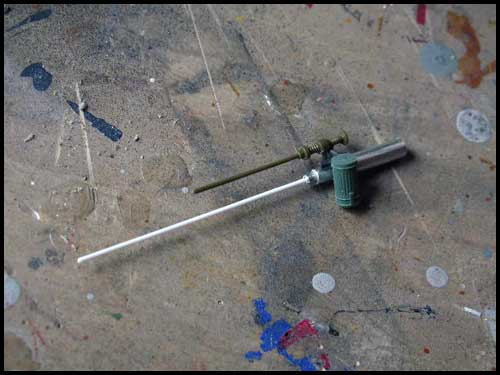 Antenna Array |
| The main body will be realized as a solid cast hull so I inserted some brass nails with rounded ends to simulate large rivets holding the hull in place. These were placed along the lines of symmetry that I had previously drawn on. | |
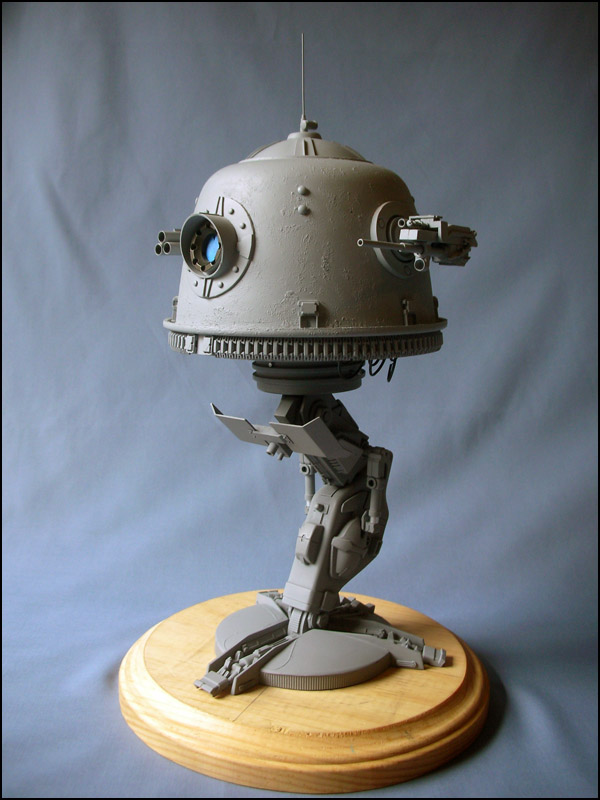
| The antenna was built using a few 1/35 military parts were used as well as aluminum tubing and very thin styrene round stock. It's funny how rewarding building something as simple as this feels! |
| - Sockets & detail - |
| This droid is supposed to be a weapon of war so it needed to be able to mount some armament. Therfore, I built sockets into the sides of the hull to allow for that. I used old, discarded hardware from work, strip styrene and a wheel piece from a model car to accomplish this. I also allowed the armament to be moveable by using aluminum tubing in the joints. |  Armament Socket 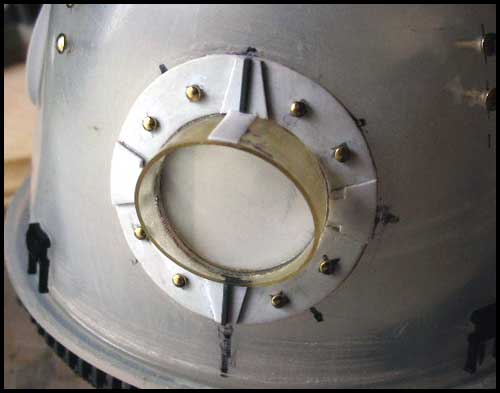 Eye Socket 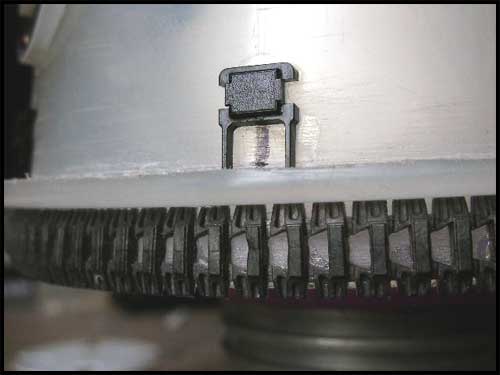 Hull Detail |
| I felt the need to incorporate an eye socket to give the droid some character. Again, styrene, brass nails and plastic tubing were used to shape this area. The found object that will serve as the eye is made of metal and has a natural metal look that I feel is perfect . Therefore that piece has not yet been installed but will be after painting of the model is completed. | |
| The hull needed some detail so I started by adding bits from old floppy disks above the protruding lip of the bowl. Next, I installed a length of track from a 1/35 Tamiya German HANOMAG along the bottom edge. |
| - armanment - |
| I wanted to give this droid a futuristic looking plasma cannon so I again borrowed 1/35 tank parts and bashed this up. The barrel is aluminum tubing as well as the mounting point that will meet with the armament socket. | 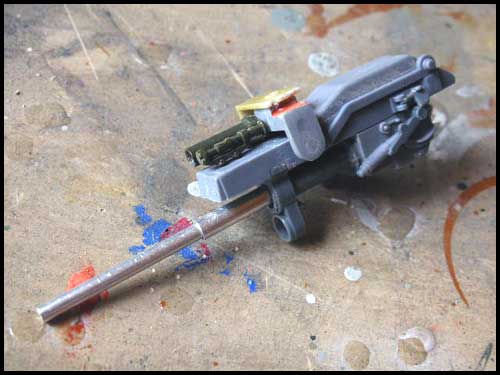 Side Gun  Rocket Tubes |
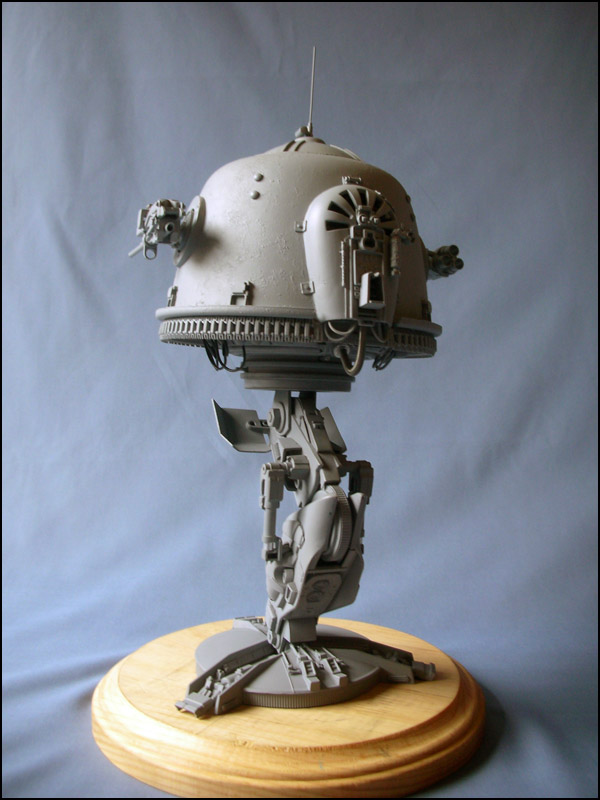
| The weapons systems needed a bit of variety so I went with different weapon hardware for the opposite side. The tubes are aluminum tubing dressed up with pieces of strip styrene, t-bar and 1/35 tank parts. Later, I would add modified 1/35 tank shells for rockets. |
| - engine - |
| I got this neat idea to use the shell from an old auto air freshner for the engine of the droid. The slots make cool vents and the whole thing keeps the round shape look of the main body. The innards of the engine came off an old G.I. Joe vehicle with 1/35 tank parts added for interest. |  Engine Detail 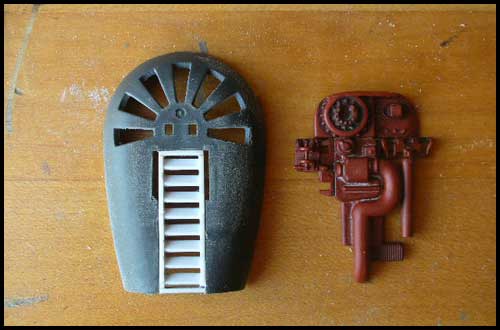 Engine Parts 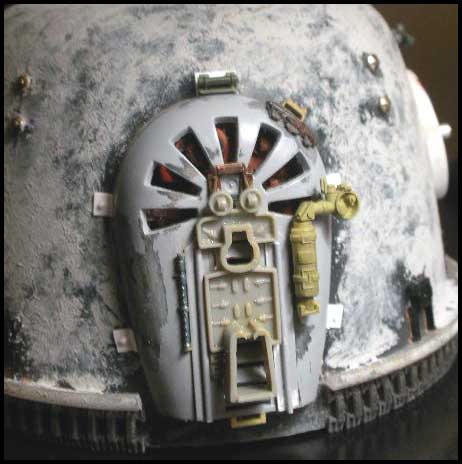 Finished 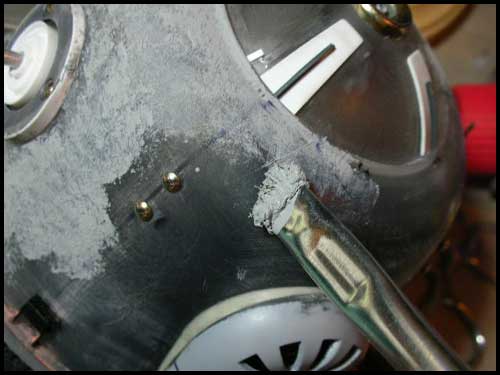 Adding Texture |
| The air freshener was cut up and modified a bit. I had to paint and weather the engine details before attaching the whole thing to the droid body since I wouldn't be left with any room to work with afterwards. I would just mask the vents with tissue during primer and paint to avoid messing my work up. | |
| More tank parts and some ship parts were used to detail the exterior of the engine. The idea is that the engine shell will be able to hinge upwards during maintenance so I placed little styrene bits around the panel to suggest that it is in a locked position. | |
| I also went ahead and took the time to add texture to the main body to give it a bit of a gritty look. I learned this technique in an issue of Finescale Modeler way back in the day and had always wanted to try it. Mr. Surfacer 1000 was used for this. It's a bit thin but it's all I had so I just thickened it up with Durham's Rock Hard Water Putty. The mix was applied with a stiff brush and allowed to dry. |
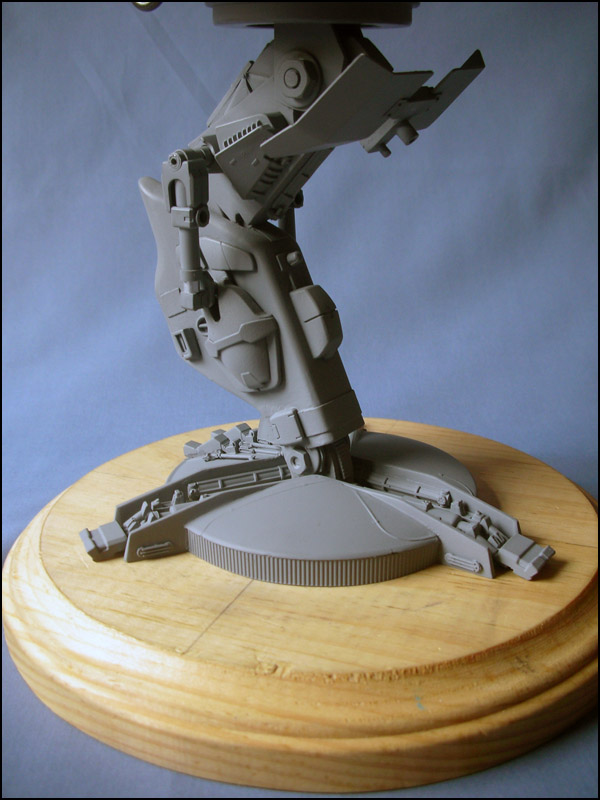
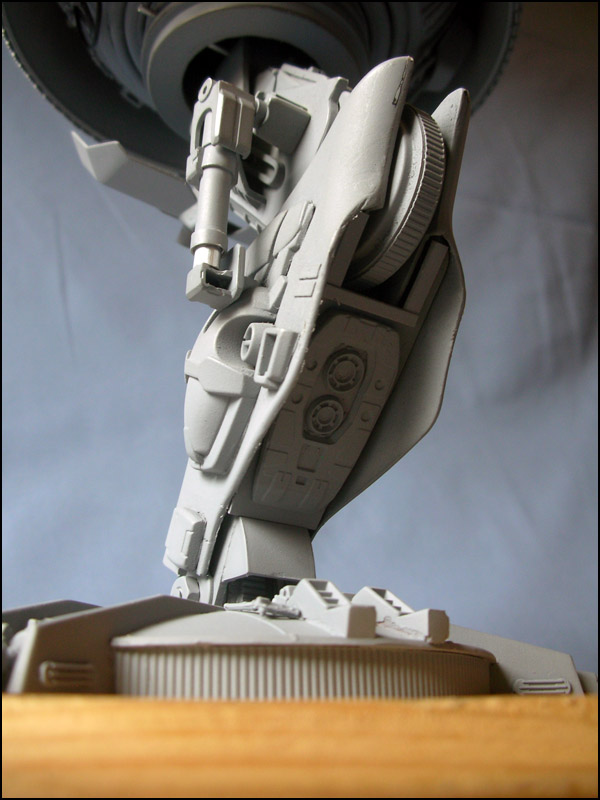
| - lower & upper Leg - |
| Using Photoshop, I drew out simple leg parts so that I could get an idea of the structure and scale. While this helped out, I still felt stuck. Since I was mostly using found objects, I'd have to find things that would fit this pattern. Scratch-building every piece of this model would surely have been easier; I could easily draw the exact part and build but I prefer to take shapes from everday items for this project. | 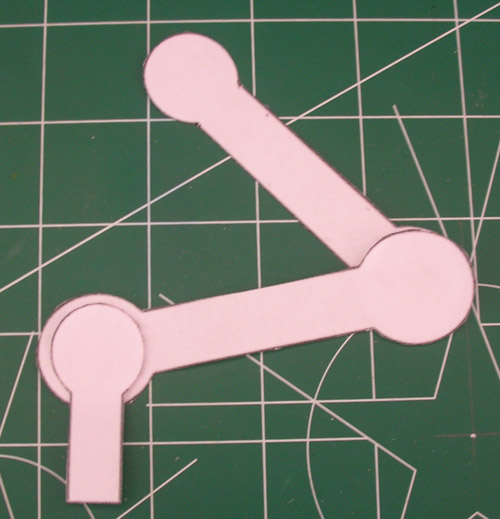 Leg Pattern 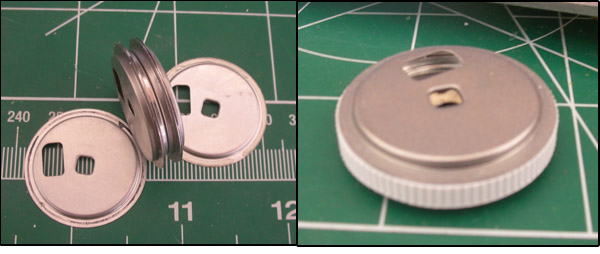 Leg Gear 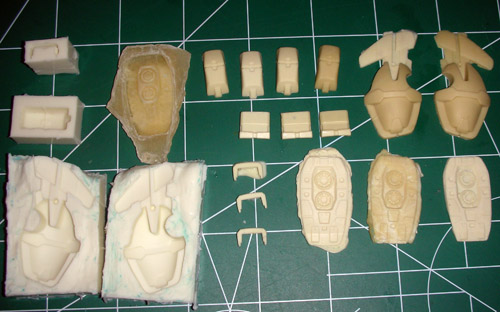 Molds & Castings 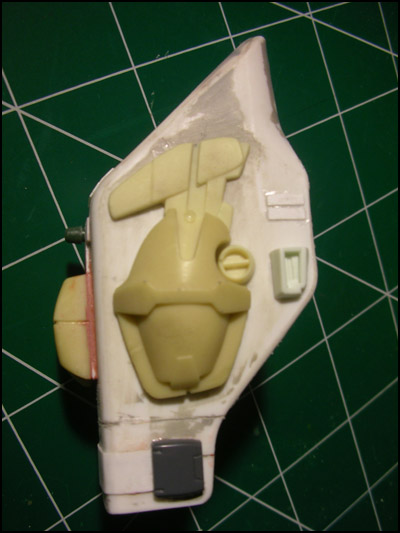 Lower Leg |
| A good example of that would be the back, main leg gear. I saved a bunch of diskette pieces; this here being the metal piece that holds the actual disk. I glued a few together and inserted a strip of textured styrene sheet. I now had a simple leg gear. | |
| I was throwing away an empty Windex bottle when I noticed the spray nozzle cover. An interesting shape, it looked like it probably would fit somewhere in the leg section. Sure enough, it was perfect for the lower leg part. I cut it up a bit, added some inner walls and for the first time, dressed it up using resin parts that I actually copied myself. I'd never done molding and casting and was excited to finally give it a try. Armed with a 50% off coupon, I purchased an Alumilite Set at Hobby Lobby. Casting is so much fun and so helpful! I did use latex for one of the molds; it was good to compare two different mold materials all in one project. RTV wins, though! |
| For the upper leg I took a piece of wood and began by laminating it with sheet plastic. I planned out where the joint leading up to the head would go and drilled a hole. From there on I picked out some doner parts from my spare kits and dressed things up a bit. As for the joint again, I fabricated a piece simply using sheet plastic and a length of wood to hold the head up later when the model was complete. | 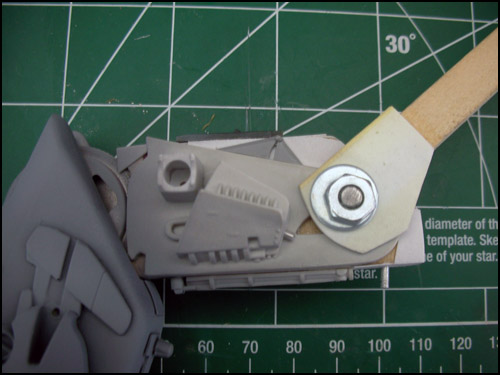 Upper Leg 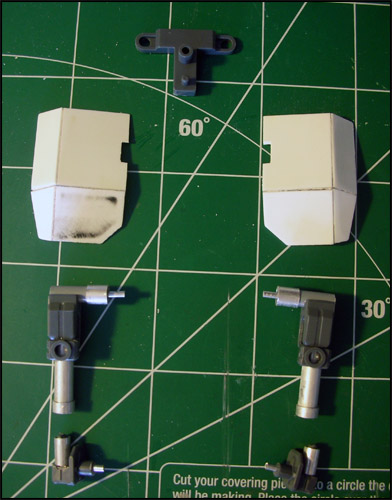 Extra Detail 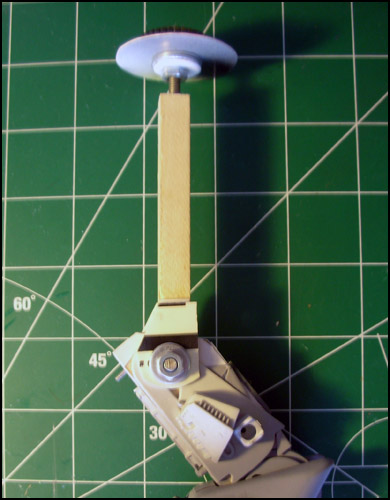 Support Piece |
| I felt that the need for some kind of defense, even if impratical, around the head/leg joint. Here is a simple little part that I surprised myself with. It started off as two flat pieces of sheet plastic. With a few cuts, I now had angled plates. The center holding fixture came from a Gundam kit and was perfect for the job. | |
| Lastly, the idea of how this thing might even attempt to get off the ground swirled around in my head. I'm a sucker for pistons and hydraulics (they look so cool) so I figured that was what might aid in this bad boy actually jumping around. I used tubing and doner parts to fashion both pistons and attached them to both leg pieces. |
| - Foot - |
| I knew that I wanted to use the leftover stand from my ID4 Alien Attacker to fashion a foot of some sort but it needed some bulk, otherwise, the model would appear top heavy. After a few unsuccessful attempts I stumbled upon the end piece from a AMT Fruehauf Tractor Tailor. A few cuts later and I was able to add some mass to the foot section. | 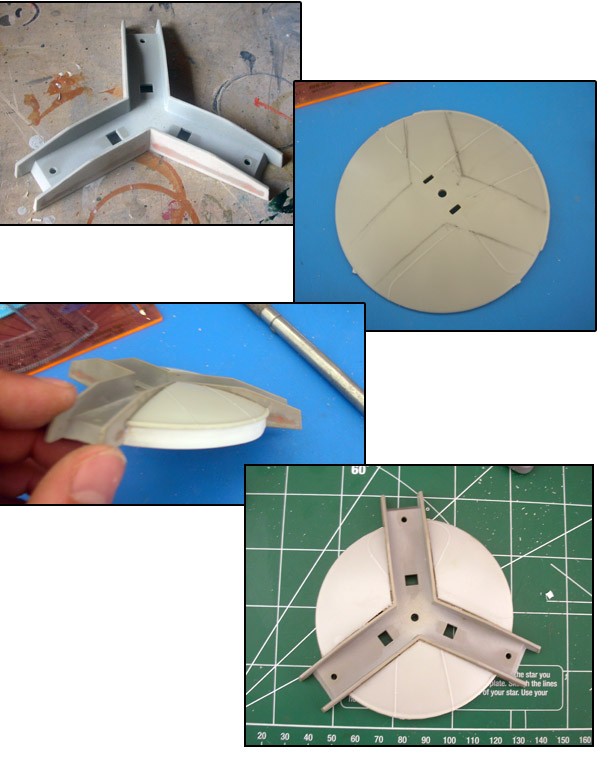 Foot 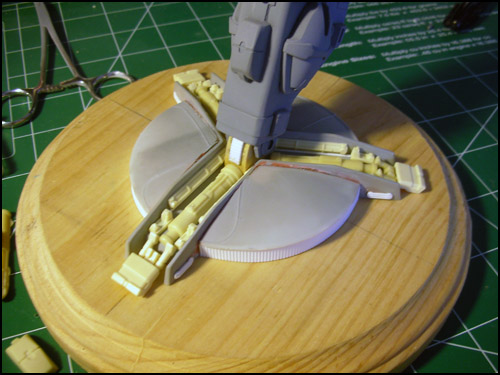 Foot Parts 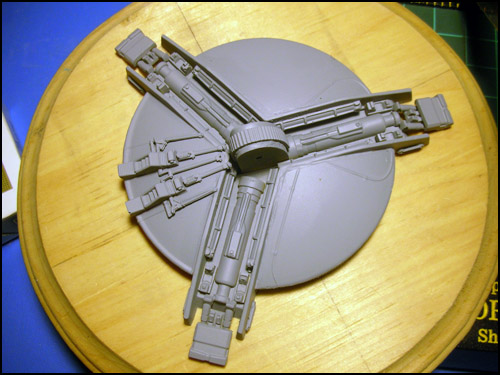 Completed Foot |
| I was excited to detail the trenches of the foot but honestly I was also stumped. After searching through many of my doner kits I opted to use only parts that I could copy using one-part molds just to keep things simple. I made my casts and arranged things in the best way I could to give a sense of purpose. So far this is my favorite part of the model. | |
| I wanted some part of the curved surfaces to look different so I added some greeblies to the back end of the foot. I also laminated the side edge of the foot with strips of patterned sheet styrene. |
| - underbody - |
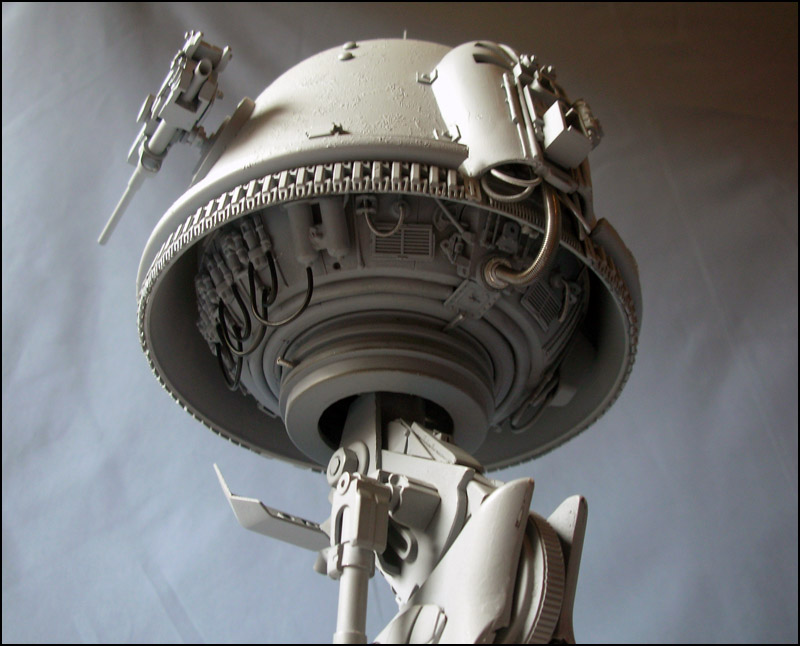
| The last thing I needed to build was the underbody beneath the hull. I wanted this area to look very busy, almost messy. I took inspiration from the advanced equipment at work which often led me to ask what those engineers were thinking when they built it. | 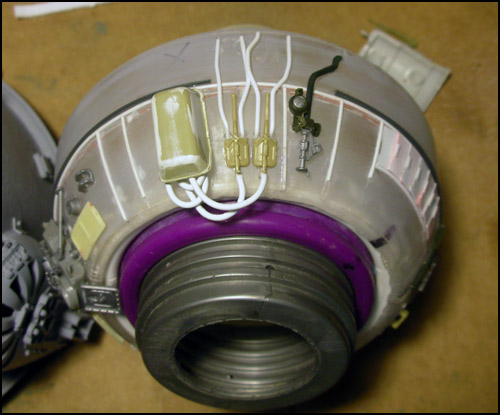 Underbody 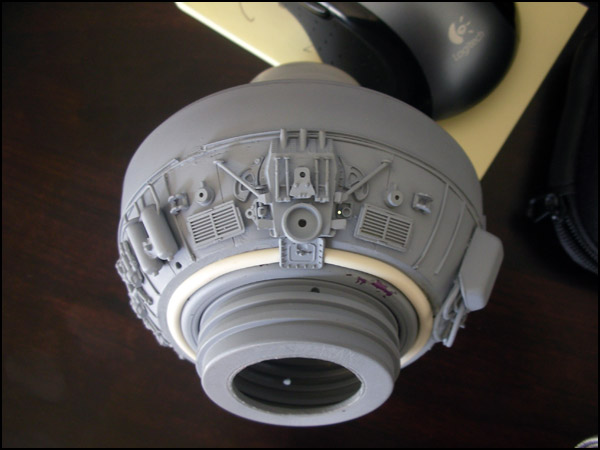 Primered |
| Again, I reached deep into my spare parts bin for this one. I took a few medium sized donor parts and surrounded them with bits of styrene, wire to simulate hoses, smaller donor parts, etc, and tried to arrange everything to give the impression of individual systems. |
| - the end ... for now - |
| Unfortunately, it looks as though I will not be painting this model at the moment. I am still setting up my garage and until I buy a paint booth, I will not be airbrushing. I tired of having to clean off overspray from all the surfaces in my last hobby rooms and will not go through that again. The bright side is that I accomplished what I was after, that is, building something original. Until it is painted and completely finished, thanks for reading and I hope you enjoyed it! |
      |
 |
| © Copyright 2005-2014. All photos of actual models are property of Joe Jimenez and cannot be used without permission. |