
|
- Spray Can Metallic - |
- Vacuum Forming Box - |
| - A SIMPLE SPRAY CAN METALLIC TIP - |
| Alclad II and Mirrachrome metallics are two great choices if exposed metal surfaces are desired. However, if all you need is a metallic undercoat to be seen through scratches in the paint then Alclad and Mirrachrome may not be the most economical ways to go. | 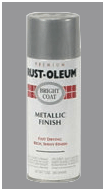 RUST-OLEUM |
| Spray metallics, on the other hand, are ideal in these cases. However, trying to use these paints the same way you would non-metallic spray paints will usually result in the paint pooling up in corners causing air bubbles and tackiness hours after painting. I realized that I was spraying too slow and handling the parts too soon afterwards. | |
| Metallic finishes have such great coverage that fast swipes while spraying are all that's required for nice, thin coats. If you are in a hurry and are working with styrene or thick resin, allow the parts to dry directly under sunlight on a non-humid day for fast curing times. Otherwise, cover the parts from dust and let cure for at 3 to 5 days. You'll be happier with the results! |
| I prefer Rust-Oleum Metallic Finishes which I use in this tip. Practice on a scrap piece first if using other brands. |
| - CHROMING WITH ALCLAD II - |
| By no means is this an all-inclusive or sole way to simulate chrome on a model. This is the process I like to use which I learned by studying several techniques on the internet. Also, I'm assuming you have fixed any pin holes, mold lines, etc. before moving on. | 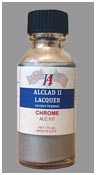 Alclad II Chrome |
|||
|
||||
| Process (please read before trying): 1 - If texture is present, lightly wet sand bare surface with 800 grit sandpaper. 2 - Primer model evenly and allow to cure 24 hours. Then, wet sand with 1000 grit. Afterwards, wash model under luke warm running water followed by a cleaning with a 50-50 water/alcohol mix using your Micro Sheen rag. All you have to do is dip a corner of the rag with your finger into the mix, wipe and re-dip as necessary. Allow surface to air dry. 3 - Decant Krylon gloss black. I don't thin it for airbrush use but you can by using a good lacquer thinner if desired. Build the color up with several thin misted coats allowing 10-15 minute dry time intervals then a final even, wet coat. Allow final coat to cure for 5-7 days. Also, start using your cotton gloves to handle the surface from now on unless, of course, you are polishing with compound or wet-sanding. 4 - When cured, wet sand the black surface with the Micro-Mesh kit using all grits and liquid compound. For the compound, use the flannel rag that comes with the Micro-Mesh kit or a new, white cotton shirt. Afterwards, clean with 50-50 water/alcohol mix as in step 2. Dry surface with remaing dry portion of Micro-Sheen rag or with another dry Micro-Sheen rag if you have more than one. 5 - Clean surface of any dust or particles with combination of clean Micro-Sheen rag and compressed air. Clear coat surface with poly-urethane Minwax spray can. Get to know the flow of this stuff on a scrap piece first. Once you do, you want one even wet coat. Cover from dust and allow to cure 5-7 days. 6 - Repeat step 4 but use only top three grits and liquid compound. The surface should be really smooth at this point so concentrate only on dust specks or problem areas that have made it this far. If you are lucky and have been careful, little or no flaws should be present. Clean again with 50-50 water/ahcohol mix and dry. 7 - Clean surface of any dust or particles. Ready Alclad II Chrome for airbrush use. Spray at 15-20 psi. My experiences have shown that you can spray this stuff in one session until you achieve the results you want but if you want to build it up in mist coats with dry time intervals, by all means, take your time! Allow to cure for 24 hours or longer after final coat. With Alclad II you will notice a slight dusty effect. Simply take your Micro-Sheen rag and gently polish the model. Remember use your cotton gloves and be careful not to mar the surface. 8 - If the model will not be handled, there is no need for a clear coat. However, if you must seal it, test and research the type of clear you want to use. I've noticed that even Future will take some sheen away from a Alclad II Chrome surface. Hope this helps!!! |
| The following articles absolutely helped in learning how to achieve glossy and chrome finishes. I thank the authors of those articles for taking the time to teach us their techniques! - The Secret Life of Alclad 2 - |
| - CUSTOM B-WING DECALS - |
| I thought I would share my custom made B-Wing decals. These came about during the build-up of the Blue Moon 1/48 scale B-Wing. Although they look accurate they are not exact replicas of the decals ILM used for the filming models. I apologize but you will have to scale them down yourself. Email me for the PSD file. |  |
| - GREEN MODELER - |
| Using found objects is nothing new to this hobby. Being aware of the enviroment is a good thing but this article is not about joining Greenpeace or hugging trees. Rather, I simply want to point out the advantage of using everyday items around the house, a practice that can yield cool shapes for your project. |  |
| Below are some good examplesof found odjects. Thanks to those who submitted tips! |
- Do yuou remember the cheese and cracker snack packs that came with a little red spreader stick? Well, Andy Mihail (aka Prince of Styrene II) suggests using the spreaders to prop your model up during painting. He says, "I used them as a set of "legs" to hold up the PL TOS E kitbash part I was primering so it wouldn't fall over". 2 - Sprinkler parts, asthma medicine dispensers, chair tips - puddingwrestler3 - X-Mas Lights, correction tape dispensers - Scotaidh 4 - pll dispenser blister packs - TER-OR 5 - disposable contact lense bubbles - Scotaidh 6 - q-tips, soad can bottom - Go Flight 7 - soda can aluminum - macfrank 8 - vcr tubs - shadowbeast 9 - kool-aid containers Splatcat |
| - vacuum forming box - |
After a few years of contemplating building a vacuum forming rig I finally did it. Here's a quickie on how I built my own vacuum box. Enjoy! |
 |
 |
| © Copyright 2005-2014. All photos of actual models are property of Joe Jimenez and cannot be used without permission. |