
|
| Ever since I saw the movie Robocop as a young kid I've been fascinated with ED-209 and have always wanted to build my own. Well, I hadn't yet gotten into model making at age 9, when I first saw the movie in 1987, and was light years away from discovering vinyl kits. |
| I got back into models in late 2003 and read up on a "once upon a time" company called Horizon and saw that they made an ED-209 kit. Luckily, a helpful hobbyist sold me his old kit and away I went! |
| By no means am I a highly skilled model maker. I am documenting this build in hopes of giving the beginner-to-moderate modeler a little more reference on this subject and kit, something I had a hard time finding when I started this build. |
| - The Kit - |
| This is a vinyl model kit which requires a bit more patience when working on but is a great medium, nonetheless. The kit came to me partially built. A few minor pieces had been glued and most, if not all, the flash had been removed by the previous owner. This kit was meant to be pose able but the joints that allowed for that had been removed along with the flash. | 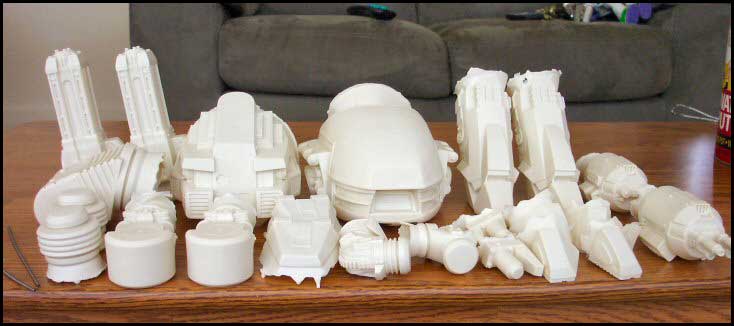 Parts  Flash |
| Keep in mind that I started recording the whole process long after I began construction. So the pics of the brand new, un-built pieces are from another ED-209 Horizon kit purchased afterwards from a kind hobbyist, just incase I ruined the first one. |
| - Research & Preparation - |
| Since this is my first vinyl kit, about two months went towards research, first on vinyl kits and then on ED-209 itself. There's a lot of work to be done if you want your ED to look close to the movie models. I had to invest in tools and products and acquire new techniques that I had never used for model making. For instance, I had never needed to fill a model or use paints other than enamels. |
| As with anything else, plan out the details! And if you have never worked with vinyl, do your homework, since many things will arise that you may have to troubleshoot on your own. However, don't be discouraged! This is a big kit and is lots of fun to put together! |
| - Construction - |
| Actual construction began sometime in June 2004. I started off by inspecting all the parts for air bubbles and then filling with putty and thin super glue (CA). Many air bubbles that aren't obvious can be found by gently probing the tip of your hobby blade on areas of the plastic that look sunken in a bit. Take your time and look over every piece well, as I found many large, sub-surface bubbles later in construction. | 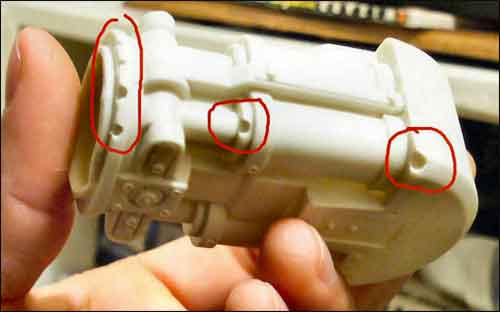 Air Bubbles  More Air Bubbles |
| © Copyright 2005-2014. All photos of actual models are property of Joe Jimenez and cannot be used without permission. |