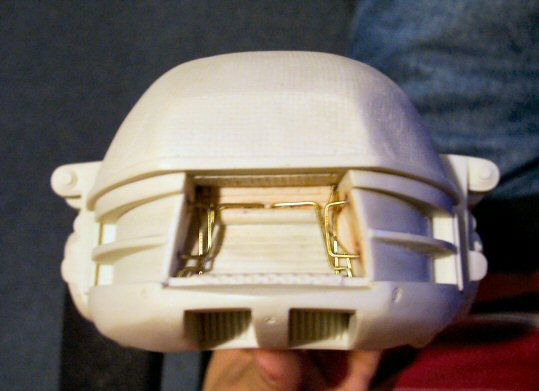
| Successfully building the head was definitely a boost of confidence! I started by detailing the grill area with different gauges of wire, replicating the movie model as best as I could. This was done prior to filling with foam. I didn't have my Craftsman Rotary Tool at the time so I simply held the wire to a lighter and pushed them into the plastic and then super glued in place. |

Grill Wiring

Primered Wiring

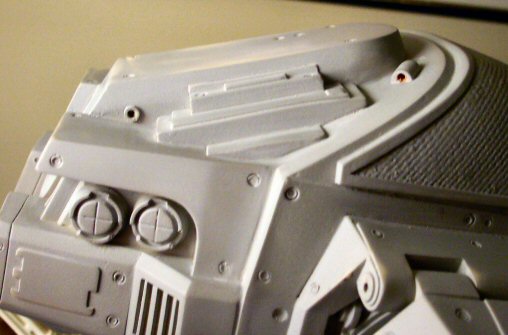
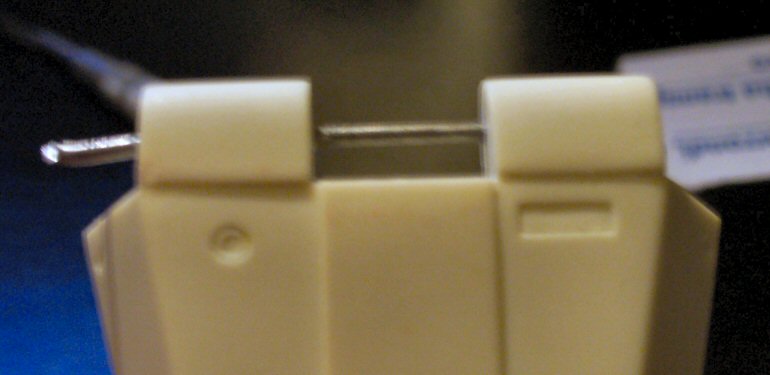
Head Seam

Drilled Holes |
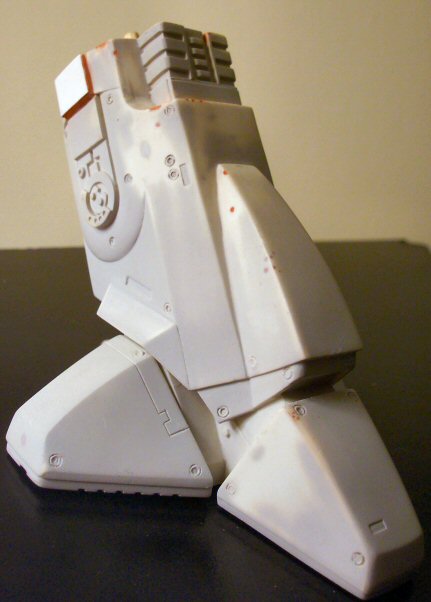
| The head comes in two halves which lack any kind of alignment pins to help hold in place while the pieces glue together. My modeling skills were surely tested here. |
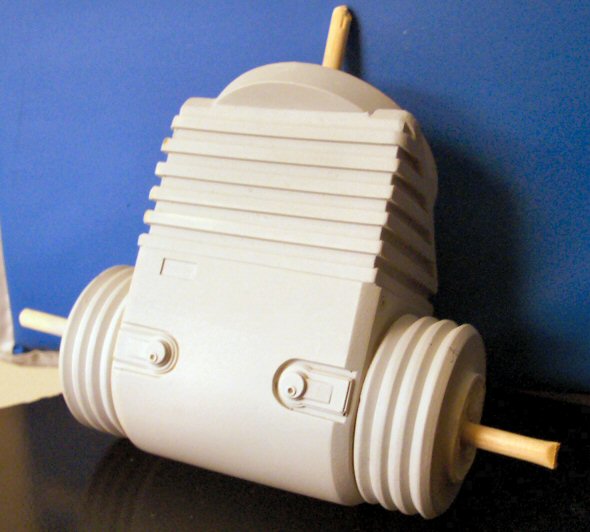
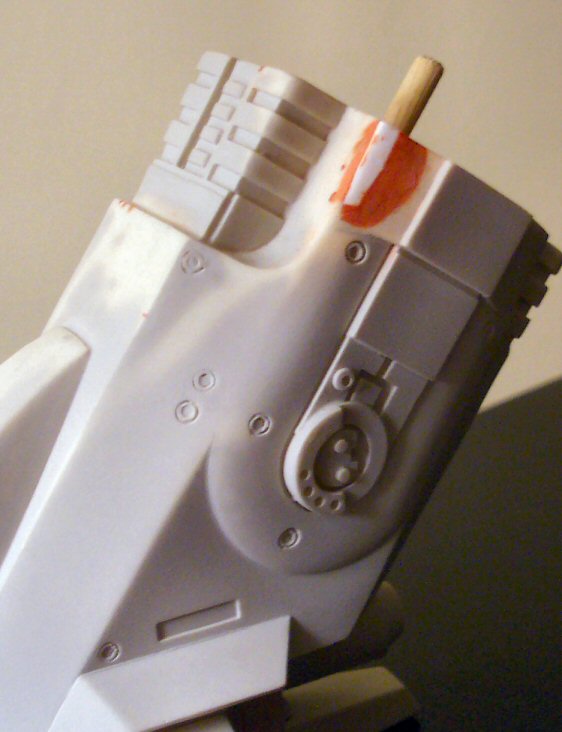
| I was reluctant to fill the pieces with foam until I was really sure the parts looked good enough together. This was done by about two weeks of dry fitting and "heat therapy" to fix major warping. I spent a lot of time in front of the mirror, looking at the head assembly from different angles. When I felt comfortable with the fit, I went ahead and filled both pieces. The excess foam was shaved so that both pieces fit perfectly. I then stuck two popsicle sticks in the foam for joint support and epoxied. When that dried, any corners that remained sticking up were heat treated and glued in place. |
| There are still areas that are warped but are fine since most warped areas are on the back or bottom of the head out of sight for the most part. I went over the seams with putty and super glue and worked it until it looked like one piece. Last, I went ahead and drilled out holes so that I could attach the thick black wiring that goes on back of the head. |
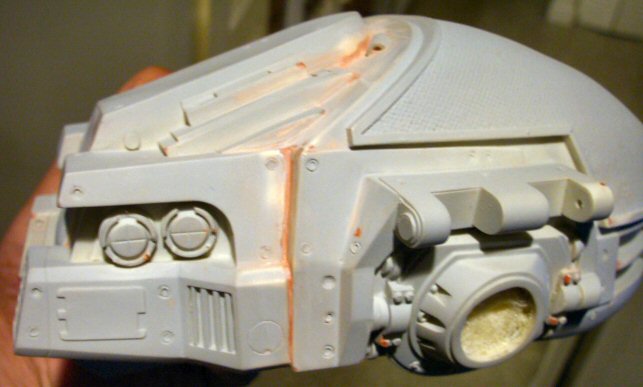
| Sometime in September 2004, I saw a thread over at Starship Modeler about Ken Rice's Horizon ED-209 and the awesome modifications he made to his kit. He influenced the modification on this area of my kit. When I began researching ED-209 material, I could not find one single picture of the undersides of the shoulder pads. I also overlooked a few quick glimpses of the flaps in the movie when ED-209 falls down the stairs. |

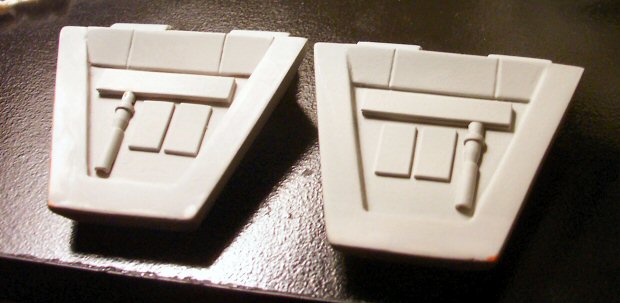
Movable Flaps

Incorrect Detail

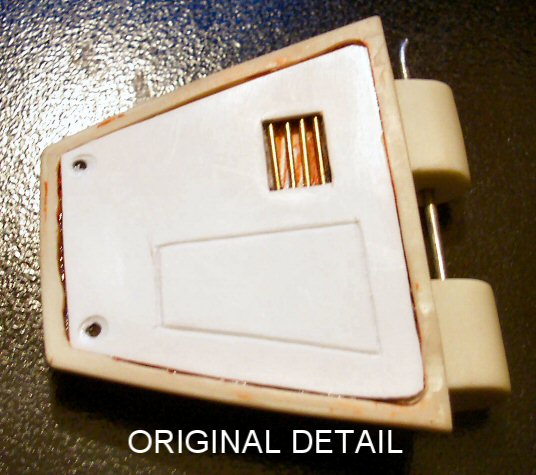
Correct Detail |
| Initially, since I didn't have any reference material for these parts I decided to scratch-build what I thought looked best. Let me remind you that scratch-building was something that I had never done up until this build. First, I filled in the shoulder flaps with foam and shaved the excess down. I then cut a piece of plastic to an approximate size and laid it on the underlying dry foam. Any seams were filled with putty or panels that didn't fit were filed down. This eliminated the need to have to precisely measure the panels. |
| I wasn't too happy at all with the result. All I did was make a vent, scribe a panel and cut out a section where greeblies would have gone. After seeing Ken Rice's kit, I contacted him and he hooked me up with two pics of the flap underside from the stairway scene. AWESOME!!! I went back and rebuilt that area and was very happy this time! Styrene was used again as well as an electrical pin cut in half for the cylinder shape. Later, I drilled through the shoulder flaps so that I could later run a rod through to make them moveable. |
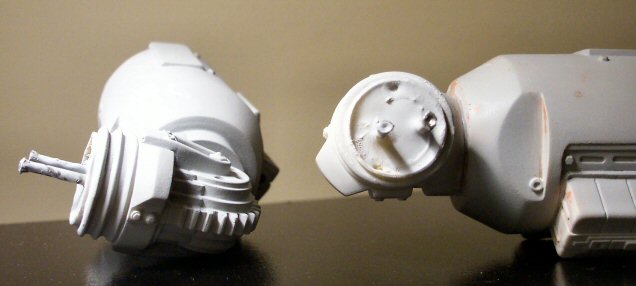
| I filled the guns and elbows. After the foam was dry, I epoxied two thin nails into the foam in the gun pieces which would serve as alignment pins as well as reinforcement when gluing. I then drove the nails into the foam inside the elbow pieces, dry fitted a bit and epoxied into place. I went ahead and puttied the seams between the elbow and gun only because of the large space left behind. Later before painting, I will scribe a thinner separation line between the parts. The gun barrels were drilled out, as well. Oh, and dry fit as much as possible! You want to line up both guns to their respective elbows the same way or else you will have two rotated and uneven guns, which would look rather silly. |

Pin Holes

Fixing Corners |
| Prior to filling with the water putty, I positioned nails where the toe pieces would go for joint support. At the time, without a rotary tool, I would have never succeeded in drilling into the putty...it really does dry rock hard! When the water putty was done drying, the toes were filled with foam and glued into place. |