|
| - the last stretch - |
| Whoever said Alclad was difficult to use was wrong!!! I absolutely love this stuff! Now that we are talking about things we like, I've gotta mention Tamiya masking tape and the fact that it does not leak under the edges at all (at least in my experiences). I went ahead and bought some of the thin tape and have become a fan! |
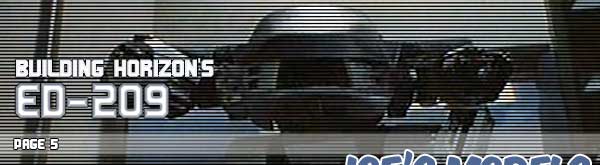
| I proceeded to mask off areas that would take Alclad 2 Polished Aluminum. Swanny's tips on using Alclad was a big help! I laid down a few coats of Krylon gloss black and allowed that to dry overnight. The next day, I shot a few coats of Polished Aluminum. Prior to actually using this stuff, I have always read that the surface preparation should be about perfect. There were areas on ED that weren't perfect and still came out looking good. I also didn't pay much attention to the amount of dust in the air and still had no problems. For competition purposes, it wouldn't hurt to go the extra mile but what intimidated me was thinking that everything had to be perfect and I was always afraid to use certain products or techniques in fear of messing up. Not anymore! |  Alclad II 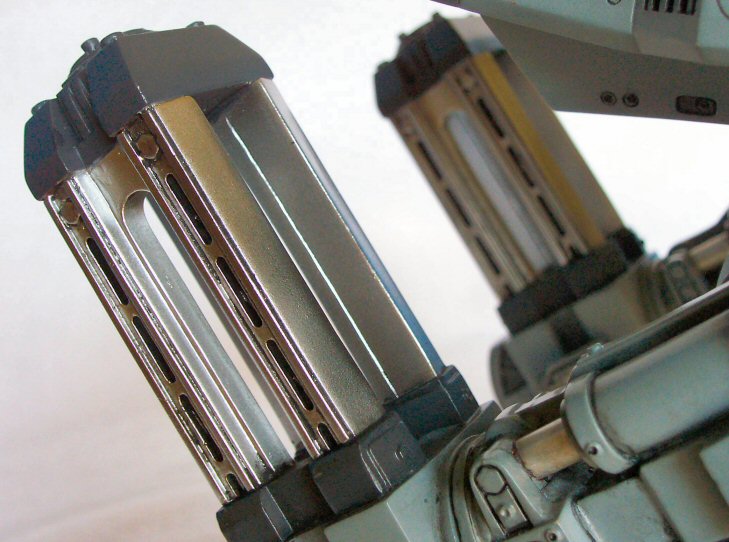 Painted Rails 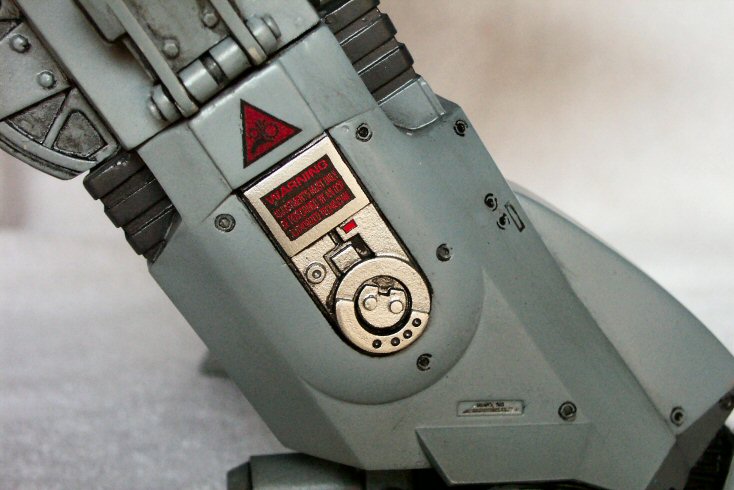 Thanks, Ken!  That Dirty Look |
| I did begin to notice that the dry Alclad was starting to rub off, especially on the sharp corners. I rubbed a flat area with my t-shirt and more came off. It doesn't really bother me though. To remedy this, I simply recoated the bare areas, kept handling to a minimum and sealed with a semi-thick coat of Future when the Alclad had dried well. Problem solved! | |
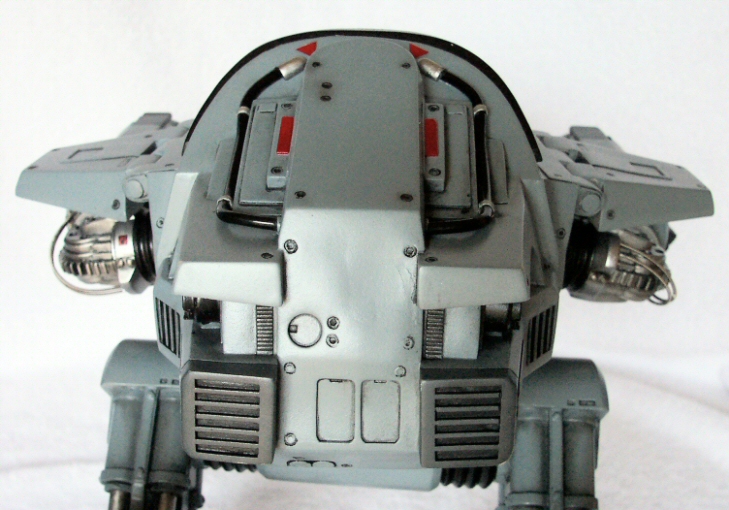
| Finally, pretty much all the painting was now done. I went ahead and put all the sub-assemblies together. I would still have to go and touch-up some areas but the main part was over. I laid done a coat of Future, let dry and added the decals. Big thanks again to Ken Rice for supplying me with the decal file he created. This was my first time printing my own decals and accidentally used transparent paper which resulted in darker decals, but I was still happy. The only things that the decals didn't cover were the red markings on the back part of the head. I masked off the areas and airbrushed these details in myself. Ready to use decals are now available at JBOT Decals. | |
| I began to think of how much weathering I would add. Initially, I wanted to build a studio replica of the office scene ED-209 but that didn't seem as fun so I decided to dirty him up a bit. I used ground pastels, ground pastels thinned with water and a drop of dish soap, thinned acrylic flat black and silver enamel for chipping here and there. I sealed all this mess with Model Master Semi-Gloss Clear. A coat of Future was dropped on the black grill area on the head as it didn't look good without a slight shine. |
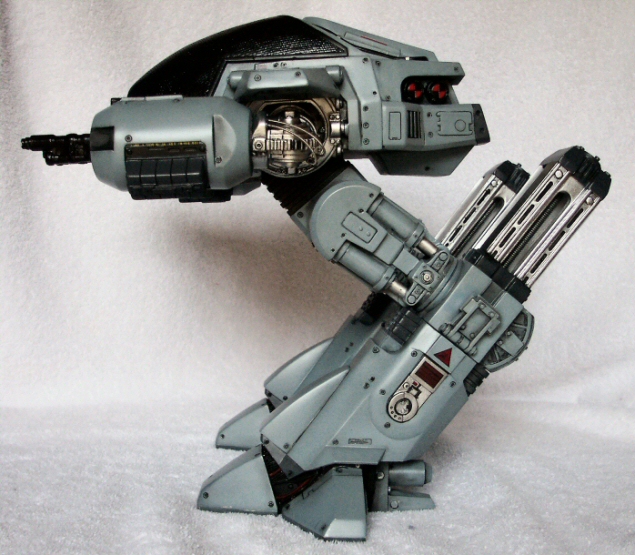
| Afterwards, I glued the missile tubes, missiles and the screws for the legs in place. For the screws, threaded rod was cut in half...enough for both legs. I then drilled a hole through the cap piece atop of the rails, routed the piece of rod through and twisted it a few times into the hole I had already drilled on the bottom of the rail piece. By doing this, I avoided having to use glue to hold the rods in place. |
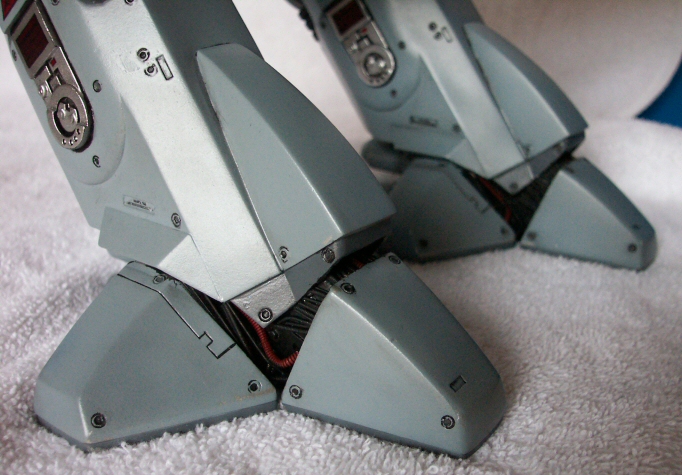
| Next came the most tedious part of the whole build...adding the wire details. The wiring located on the elbow piece was the easiest. I took guitar string from one of my guitars and super glued in place. The wiring in between the toes was another story! I spent about 3 hours cutting and gluing different gauge guitar string and some plastic wiring from an old Spawn action figure. The wiring on the guns was the most satisfying! Regular insulated wiring was used in-between the guns. For the very thin wiring that goes from the gun to the front of the missile launcher, I ripped out the copper strands from inside an insulated wire, glued about 6 strands in place and painted them all different colors. I used insulated wire for the tubing on the back of the head and made the holding rings from a strip of thin styrene and painted silver. References from the movie were studied for all this. | 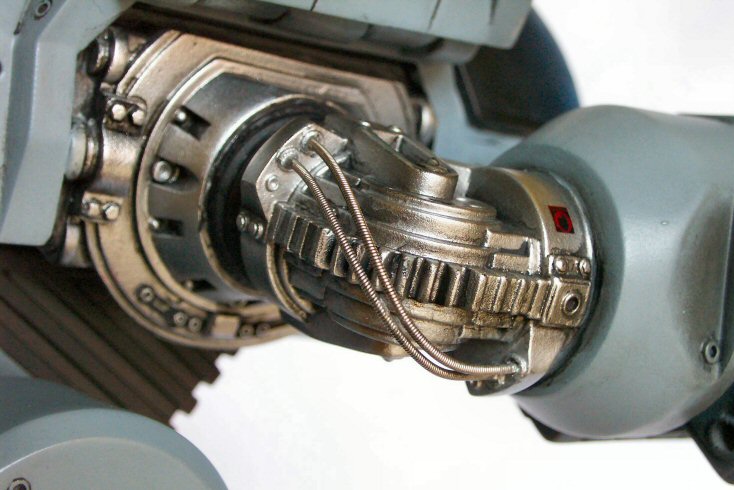 Guitar String Detail 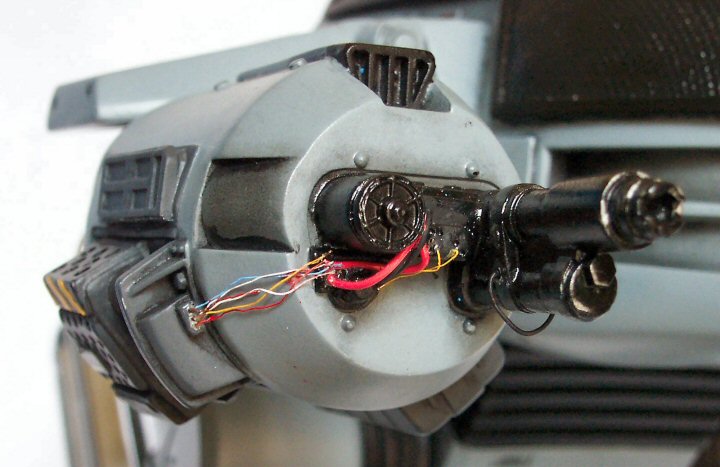 Wiring |
        |
| - all in all - |
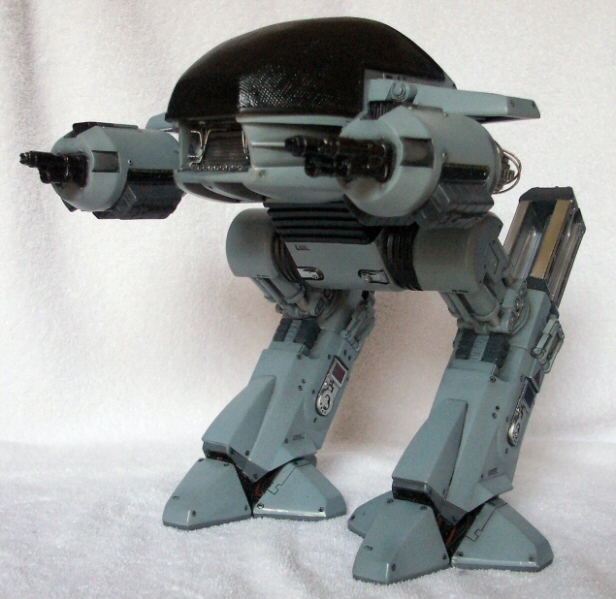
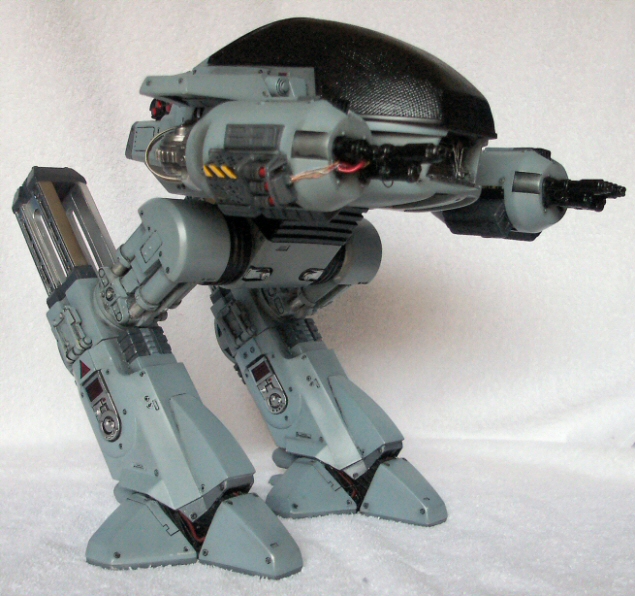
| Well, there you have it!!! She's all done...in just under a year! I will confess that there are still one or two areas that I will touch-up if not re-do such as the missile launcher aimer thingy (the thing above the launch tubes) but for now I am very satisfied. I've learned so much that now I am confident enough to tackle the pile of kits in my closet. Maybe someday I'll even build my other ED-209 in a walking/fighting pose. Special thanks to RockItDJWayne, RTBS, the nice owners at Bandit's Hobbies & Models in Darlington, SC, Ken Rice and Swanny for all your help and thank you for reading! |
| © Copyright 2005-2014. All photos of actual models are property of Joe Jimenez and cannot be used without permission. |